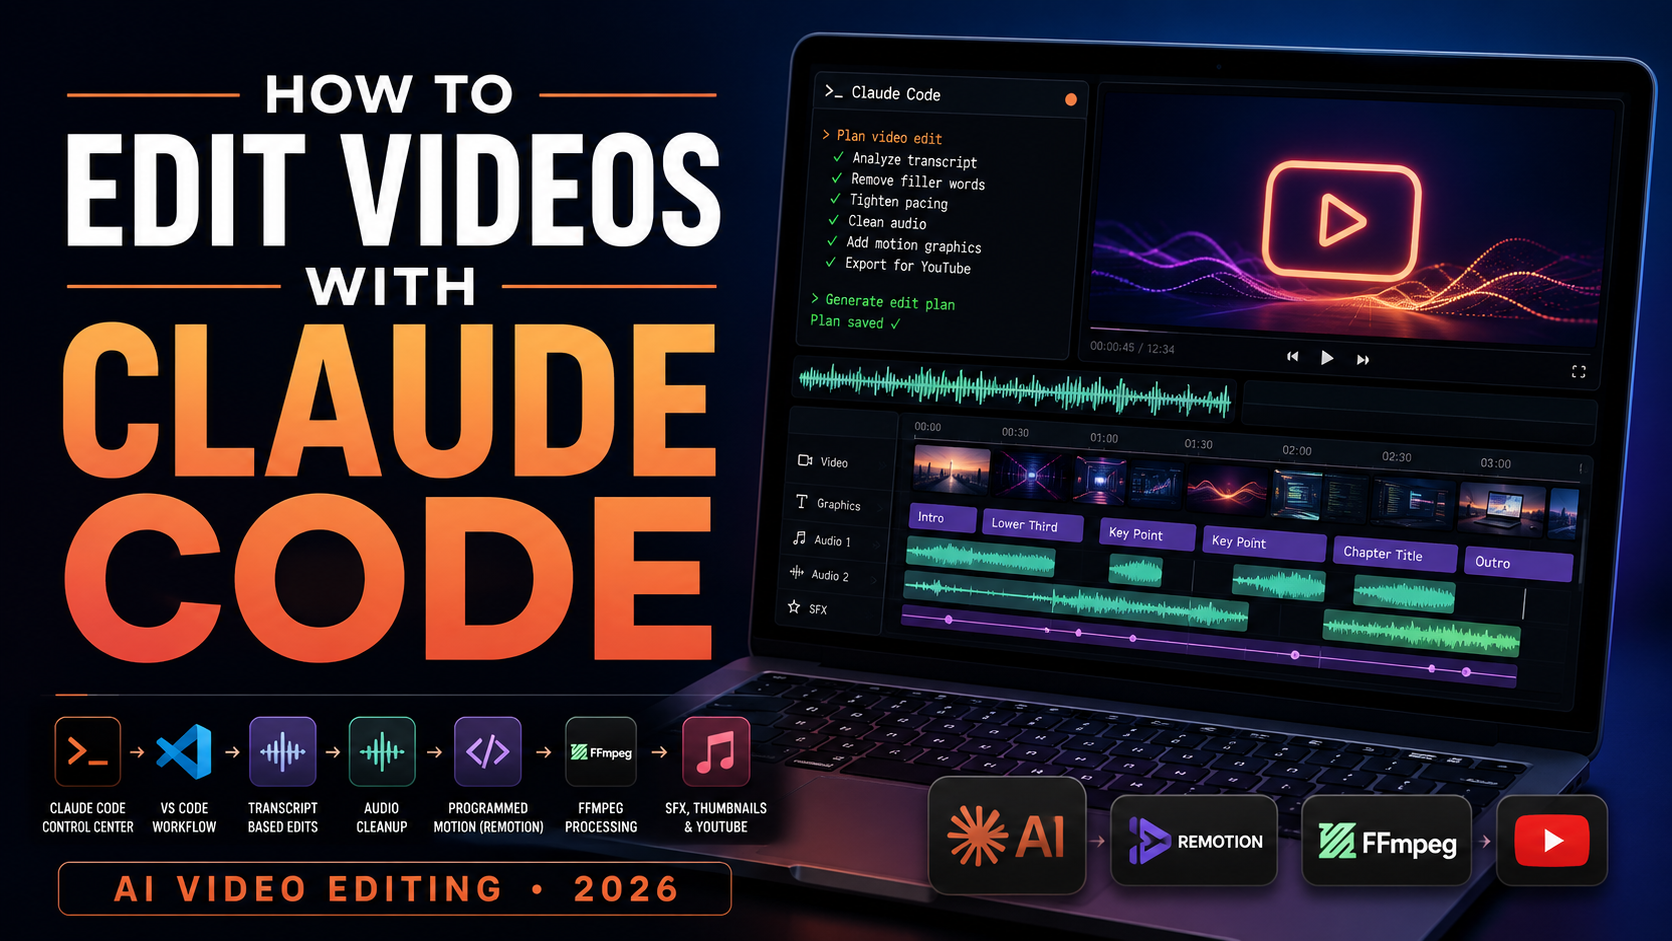
Learn how to edit videos with Claude Code using a practical beginner workflow for setup, transcript-based cuts, Remotion graphics, audio cleanup, sound effects and YouTube packaging.
This guide focuses on beginner setup and your first successful edit. After your environment works, continue with Claude Code Video Editing: Complete Production Workflow for deeper automation, architecture, quality control and scaling.
What is Claude Code and how can it edit videos?
Claude Code is an AI coding agent that can work with project files and command-line tools. For video production, the useful idea is coordination: one tool can transcribe speech, another can cut media, another can render programmed graphics, and another can process audio. Claude Code can help orchestrate those steps through a prepared project.
Think of Claude as the coordinator rather than the video codec itself. The scripts and media applications do the technical processing while Claude follows the workflow and your instructions.
What you need before you start
A workspace for the project files and integrated terminal.
The agent that coordinates the prepared workflow.
Runs transcription and media automation utilities.
Supports the Remotion-based graphics environment.
Handles low-level media reading, processing and encoding.
Optional but useful for cloning and updating the project.
Beginner tip: install Python, Node.js and FFmpeg before installing the project dependencies. Missing-command errors often mean a prerequisite is not installed or is not available in your system PATH.
Step 1: Install Visual Studio Code
Install Visual Studio Code for your operating system, open it once, and become familiar with File → Open Folder and Terminal → New Terminal. Those two areas are enough to begin this workflow.
Step 2: Install Claude Code
Use Anthropic’s current official installation instructions for your operating system. After installation, open a fresh terminal and verify that the claude command is available.
claude --version
If your terminal cannot find the command immediately after installation, restart the terminal and check the official Claude Code setup documentation for your platform.
Step 3: Download the Claude YouTube Editor project
The prepared project provides the directory structure, scripts and specialized instructions that turn Claude Code into a more focused video-production assistant.
Option A: Clone with Git
git clone https://github.com/hassancs91/claude-youtube-editor
cd claude-youtube-editor
Option B: Download ZIP
Open the repository, choose Code → Download ZIP, extract the folder and open it in VS Code.
Step 4: Open the project and launch Claude
In VS Code, choose File → Open Folder and select the project folder. Then choose Terminal → New Terminal and start Claude:
claude
Authenticate if prompted. The terminal becomes the interface where you can ask Claude to work with the project.
Step 5: Install the project dependencies
Create a Python virtual environment
python -m venv venv
Install Python requirements
# Windows
venv/Scripts/python -m pip install -r requirements.txt

# macOS / Linux
./venv/bin/python -m pip install -r requirements.txt
Set up Remotion
cd remotion
npm install
npm run gen
npm run studio
Remotion lets the workflow create video and motion graphics programmatically. Preview the available compositions before processing a long recording so you know the graphics environment works.
Step 6: Configure optional API services
Some workflows can connect to external transcription, audio or image services. Create your local environment file from the project example and keep credentials private.
# Windows
copy .env.example .env

# macOS / Linux
cp .env.example .env
| Service | Possible role |
|---|---|
| AssemblyAI | Timestamped speech transcription. |
| ElevenLabs | Optional voice/audio workflows. |
| Gemini | Optional visual or thumbnail generation. |
| YouTube | Publishing integration when configured. |
Security: never paste API keys into a public WordPress page, screenshot, YouTube description or public repository.
Step 7: Add your first raw video
Start with a short test recording. Inside the project’s video area, create a folder for the production and place your raw file inside it.
videos/
└── video-1/
    └── recording.mp4
A short talking-head recording is ideal for learning because you can quickly inspect every automated decision before moving to longer videos.
Step 8: Edit videos with Claude Code
Once the project is configured, use the workflow commands or instructions supported by the repository. Review the project documentation because command names can evolve as the repository changes.
Start with the clean cut
clean cut videos/video-1
The goal is to use transcript and timing information to identify obvious mistakes, false starts and unnecessary pauses while preserving natural delivery.
Add programmed visuals
add TSX beats to video-1
Programmed visual beats can emphasize key statements without requiring you to manually create every graphic on a traditional timeline.
Process the audio
clean the audio for video-1
Review the processed voice against the original. Noise reduction should improve clarity without making speech sound unnatural.
Suggest sound effects
suggest sfx for video-1
Use effects selectively. They should reinforce a transition or visual moment rather than compete with the narration.
Prepare the video package
package this video
Packaging can include title and thumbnail concepts based on the finished video’s actual content.
Understanding the editing skills
| Workflow area | What it can handle |
|---|---|
| Clean cut | Transcript-assisted decisions for the initial edited recording. |
| TSX visuals | Programmatic overlays, diagrams and motion graphics. |
| Audio cleanup | Voice enhancement and noise-processing tasks. |
| Sound design | Suggestions for effects at useful moments. |
| Packaging | Title and thumbnail development. |
| Brand setup | Reusable visual rules for consistent output. |
The complete beginner workflow
The review stages matter. AI-assisted editing is most useful when automation prepares decisions and the creator approves the final result.
Make the editor match your YouTube brand
Set reusable rules for fonts, colors, title cards, animation intensity and visual spacing. Consistent components make later productions faster and prevent every video from looking like a different template.
How much does it cost?
VS Code, Python, Node.js and FFmpeg are available free of charge. The open-source project can also be explored without a traditional video-editor subscription. Claude Code and optional AI/API services can have separate plans or usage charges, so check each provider’s current pricing before running a high-volume workflow.
Best practices for better AI-edited videos
Automation works better when the original recording is usable.
Clear narration makes transcript-driven decisions easier.
A pause is not always a mistake.
Not every sentence needs an animation.
Build a visual system instead of redesigning each upload.
You remain responsible for the final published video.
Frequently asked questions
Do I need to know how to code?
Advanced programming knowledge is not required to begin, but basic comfort with folders, terminals and copying commands will make setup easier.
Can Claude Code edit the video by itself?
Claude Code coordinates the workflow; media tools and scripts perform the actual processing. Treat it as an agent controlling a toolchain rather than a replacement for every underlying application.
Can I use this for YouTube Shorts?
Yes. Code-based video compositions can be configured for vertical formats, although you should adapt framing, pacing and graphics for a 9:16 canvas.
Should I review every automated edit?
Yes. Transcript interpretation, cuts, graphics, audio processing and packaging can all produce mistakes or choices that do not match your intent.
Start with one short video
Do not begin by automating an hour-long production. Configure the project, process one short recording, inspect each output and learn where human review matters. Once the workflow is reliable, reuse it on larger projects.
Get the Claude YouTube Editor →Before You Install Anything: Understand the Beginner Workflow
If you are learning how to edit videos with Claude Code for the first time, it helps to understand what each application is responsible for. Claude Code is the coordinator. It can inspect the project, follow its instructions, run supported commands and help you move through a multi-step workflow. However, the actual media work is performed by tools such as FFmpeg, Python utilities and Remotion.
This distinction makes troubleshooting much easier. If Claude launches correctly but a video cannot be processed, the problem may be FFmpeg rather than Claude. If motion graphics fail, the Node.js or Remotion environment may need attention. Therefore, beginners should verify the setup one layer at a time instead of installing everything and hoping the full pipeline works immediately.
The five layers you are setting up
- Workspace: Visual Studio Code gives you a convenient place to browse files and open a terminal.
- Agent: Claude Code reads project context and coordinates supported tasks.
- Media engine: FFmpeg handles many low-level video and audio operations.
- Automation: Python scripts can perform transcription, analysis and file-processing tasks.
- Programmatic visuals: Node.js and Remotion provide a way to create motion graphics with code.
Once you understand those layers, error messages become less intimidating because you can ask a simple question: which layer failed?
Check Your Computer Before Starting
Before downloading the project, verify that your computer can run the required software and that you have enough free storage for video files. Video projects can grow quickly because the source recording, intermediate renders, extracted audio, generated graphics and final exports may all exist at the same time.
Operating system considerations
Claude Code supports current desktop development environments, but setup details differ between Windows, macOS and Linux. On Windows, pay special attention to the shell you are using and to path formatting. On macOS and Linux, terminal permissions and executable paths are common beginner issues.
Check available disk space
Do not begin a long render when your drive is almost full. Keep enough free space for temporary files and exports. If you work with 4K recordings, consider storing large media on a fast secondary drive while keeping code and project configuration in your main workspace.
Create one dedicated project location
For your first attempt, use a simple folder path without unusual symbols. A path such as Documents/claude-video is easier to troubleshoot than a deeply nested folder with several special characters. Later, once the workflow works, you can reorganize it.
Terminal Basics for Complete Beginners
You do not need to become a command-line expert, but a few concepts will make this tutorial much easier. A terminal is simply a text interface for running programs and moving between folders.
Know which folder you are in
Many commands only work when the terminal is inside the correct project directory. If a command says a file cannot be found, first confirm your current directory and inspect the files that are present.
Understand commands and arguments
In a command such as claude --version, claude launches the program and --version asks it to report version information. Similarly, package managers use commands followed by the package or task you want them to perform.
Do not paste unknown commands blindly
Read commands before running them, especially commands that delete files, change permissions or download executable software. For installation commands, prefer official documentation and the project’s own instructions.
Install and Prepare Visual Studio Code
Visual Studio Code is not strictly the only editor you could use, but it is beginner-friendly because it combines a file browser, text editor and terminal in one window. After installing it, spend a minute learning where those three areas are.
Open a folder, not just one file
When working with the Claude YouTube Editor project, use File → Open Folder. Opening the complete folder allows Claude and VS Code to see the project structure instead of treating one script as an isolated file.
Open the integrated terminal
Use Terminal → New Terminal. The terminal normally opens at the root of the folder you selected. That is convenient because most project commands are intended to run from the project root.
Learn to recognize the project root
The root is the main directory that contains the project’s configuration, instructions and subfolders. If you enter a subfolder to run a Remotion command, remember to return to the root before following a command that assumes the main directory.
Install Claude Code and Verify It Correctly
Installation instructions can evolve, so use Anthropic’s current Claude Code setup documentation when you install the CLI. After installation, open a fresh terminal and verify that the claude command is available.
Run a version or health check
A successful version check confirms that your shell can find Claude Code. If it cannot, closing and reopening the terminal may refresh your environment. If the problem remains, check the installation method and your system path.
Authenticate your account
The first interactive launch may require authentication. Follow the prompts presented by Claude Code. Do not copy authentication credentials into public screenshots or tutorial content.
Start Claude inside the project folder
Once the project has been downloaded, launch Claude from that project’s root. This gives the agent the correct working context. Starting it from an unrelated directory can lead to confusion about which files it should inspect.
Git or ZIP: Which Download Method Should a Beginner Use?
You can usually obtain the project either by cloning it with Git or by downloading a ZIP archive. Both approaches can work, but they have different advantages.
Use ZIP for the simplest first setup
If you have never used Git and simply want to test the workflow, downloading and extracting a ZIP can reduce the number of new concepts you must learn at once. Make sure the archive is fully extracted before opening the folder in VS Code.
Use Git if you want easier updates
Git makes it easier to inspect changes and pull project updates later. It is also useful if you plan to customize the code while preserving a history of your modifications.
Do not mix two copies accidentally
Beginners sometimes edit one downloaded copy while running commands in another. Give the active project a clear folder name and confirm the terminal path before installing dependencies.
Set Up Python Without Polluting Your Computer
Python projects often depend on specific libraries. A virtual environment creates an isolated place for those packages so they do not interfere with unrelated Python projects.
Create the virtual environment
Run the project’s recommended virtual-environment command from the project root. After creation, the environment folder should appear inside the project unless the instructions specify another location.
Install requirements using the environment’s Python
Using the virtual environment’s Python executable makes it clear where packages are being installed. This can prevent the common problem where pip installs a package globally while the project uses a different Python interpreter.
What if Python is not found?
First confirm that Python is installed. On some systems, the command may be python3 rather than python. Do not randomly change every project command; identify which executable your system uses and adapt consistently.
What if a package fails to install?
Read the first meaningful error rather than only the final line. A package may require a compiler, a supported Python version or another system dependency. Search the project’s issue tracker or the package’s documentation when the error is specific.
Install Node.js and Prepare Remotion
Remotion uses web technologies to create video compositions, so its project dependencies are managed through the Node.js ecosystem. Verify Node and npm before running the Remotion setup.
Confirm Node and npm
Run version checks for both tools. If Node works but npm does not, repair the Node installation before continuing. A clean foundation is easier than debugging a partially installed dependency tree.
Install project dependencies
Enter the Remotion directory only when the project instructions tell you to. Run the required package installation, wait for it to complete, and read any warnings. Then run the project’s generation or setup command if one is provided.
Launch Remotion Studio
Remotion Studio gives you a visual way to inspect compositions. This is useful for beginners because you can confirm that the graphics side of the project works before connecting it to a complete video-editing pipeline.
Install FFmpeg and Confirm Video Processing Works
FFmpeg is one of the most important dependencies in this workflow. It can read, transform and encode video and audio. If FFmpeg is missing, many editing operations will fail even when Claude itself works perfectly.
Verify the command is available
After installation, open a new terminal and run an FFmpeg version check. If your shell says the command is unknown, the executable may not be on your system path.
Test with a small media file
Before using a long recording, test the environment with a short MP4. A small test reduces waiting time and makes errors easier to reproduce.
Keep the first test simple
Use ordinary H.264 video and common audio if possible. Once the basic pipeline works, you can test unusual codecs, variable frame rates or high-resolution footage.
Configure the .env File Safely
Many projects use a .env file for API keys and configuration values. The example environment file shows which variables the project expects without containing your private credentials.
Copy the example instead of editing it directly
Create the local environment file using the operating-system-appropriate command. Then edit the new file. Keeping the example untouched makes it easier to compare your configuration with the project’s defaults.
Add only the services you need
You may not need every optional service for your first test. Start with the minimum configuration required for the stage you are testing. This reduces cost and the number of possible failure points.
Never publish API keys
API keys should be treated like passwords. Keep the environment file out of public repositories, screenshots, blog posts and shared ZIP archives. If you accidentally expose a key, revoke or rotate it through the provider.
Create Your First Claude Code Video Editing Project
Your first project should be intentionally small. Record a short talking-head clip of perhaps one or two minutes with a few natural pauses and one deliberate mistake. That gives the workflow something to edit without creating a large processing job.
Name the project clearly
Use a simple folder such as videos/test-video. Place the raw recording inside and keep its original copy unchanged.
Tell Claude what you want before running tools
Instead of immediately asking for a complete finished video, start with a planning request. Ask Claude to inspect the project instructions and explain which workflow it intends to use for your test video. This gives you a chance to catch misunderstandings before files change.
Ask for one stage at a time
Run the clean-cut stage first. Review the result. Then proceed to graphics, audio and packaging. This staged approach teaches you how the project works and makes troubleshooting much easier.
Your First Clean Cut: What to Review
A clean cut is not simply a video with every pause removed. The goal is to reduce mistakes and unnecessary dead time while preserving natural speech.
Watch every cut boundary
Listen for clipped consonants, unnatural breaths and abrupt changes in posture. Transcript timestamps can be accurate while still requiring a small amount of padding around the edit.
Keep useful pauses
A pause before an important idea can improve comprehension. If the automated edit feels rushed, restore some breathing room rather than assuming faster is always better.
Check meaning after deletions
Removing one sentence can change the meaning of the sentence that follows it. Review the cleaned version as a viewer, not only as a collection of individual cuts.
Add Your First Visual Beats With Remotion
After the dialogue edit works, begin adding visual support. For your first project, limit yourself to a few simple elements: a title card, one key-point graphic and perhaps a code or browser demonstration.
Match visuals to narration
The visual should appear when the relevant idea is being discussed. Use transcript timestamps as a guide, then preview the timing. A graphic that arrives several seconds late can confuse viewers.
Do not fill every empty space
Talking-head footage does not need constant overlays. Allow the speaker to remain visible when the visual adds no explanatory value.
Fix the component instead of patching every scene
If a title card’s text is too small, improve the reusable component. That one fix can benefit every future video that uses the same component.
Clean Audio Carefully on Your First Video
Audio cleanup can make a bigger perceived quality difference than elaborate graphics. However, aggressive processing can create metallic artifacts or remove natural voice characteristics.
Compare before and after
Keep the original audio and listen to the processed result through headphones. The cleaned version should reduce distractions without making the speaker sound artificial.
Normalize only after cleanup
Noise reduction and corrective processing generally come before final loudness management. Otherwise, you may amplify unwanted noise before trying to remove it.
Check synchronization
After replacing or processing audio, confirm that speech remains aligned with the speaker’s mouth throughout the video. A small timing offset can make an otherwise polished edit uncomfortable to watch.
Add Sound Effects Without Making the Video Annoying
Sound effects are optional. Use them to reinforce meaningful visual events, not to prove that the automation can add them.
Start with fewer effects
For your first edit, choose only a handful of moments. A subtle transition, important callout or chapter change may benefit from an effect. Ordinary text appearing on screen often does not need one.
Keep effects below dialogue
Speech is the priority in educational content. Lower the effect level if it competes with the voice. Review with both headphones and ordinary speakers when possible.
Set Up Your Brand Before Scaling the Workflow
Once your first test works, define visual rules before producing many videos. A brand preset can include colors, fonts, logo placement, title-card behavior, lower thirds and animation preferences.
Use a small palette
A limited set of colors is easier to apply consistently. Define primary, secondary, background and text colors rather than asking Claude to choose a new palette for every video.
Choose readable fonts
Use fonts that remain legible on mobile screens. Keep the number of font families small and define which one is used for titles, body text and code.
Create reusable components
Once a lower third or callout looks right, save it as an approved component. Future prompts can reference that component instead of redesigning it.
Windows Troubleshooting for Claude Code Video Editing
Windows users may encounter shell, path and executable issues that do not appear exactly the same way on macOS or Linux.
The command is not recognized
If claude, python, node, npm or ffmpeg is not recognized, first verify that the program is installed. Then reopen the terminal so updated path settings are loaded.
Backslash versus forward slash
Windows paths often use backslashes, while many project examples use forward slashes. Use the syntax expected by the shell and command you are running. Quoting a path can also help when it contains spaces.
PowerShell versus Git Bash or WSL
Commands written for Bash may not behave identically in PowerShell. Follow the project’s Windows guidance and Anthropic’s current Windows setup guidance rather than mixing shell-specific instructions.
macOS Troubleshooting for Beginners
On macOS, common issues include permissions, multiple Python installations and command paths.
Do not solve every permission error with sudo
Using elevated permissions indiscriminately can create files owned by the wrong user or make package management harder later. Follow the official installation guidance for the specific tool.
Check which executable is running
If a command behaves unexpectedly, verify which copy of Python, Node or FFmpeg your shell is using. Package managers can install multiple versions over time.
Allow required application permissions intentionally
If your workflow needs access to files in protected macOS locations, review the permission prompt and grant only what is necessary.
How to Diagnose Dependency Installation Errors
Dependency errors are normal when learning a multi-tool project. The fastest solution is usually to identify the first failed dependency rather than rerunning the same command repeatedly.
Read upward from the final error
The last line may only say that installation failed. Scroll upward until you find the first package, command or file that caused the failure.
Confirm versions
Check the project’s documented version requirements. A package may not support the newest or oldest version installed on your computer.
Reproduce the failure with the smallest command
If one package fails, try installing or testing that component separately. A smaller reproduction gives you a clearer error message and makes searching documentation easier.
Do not delete working environments casually
Before removing dependency folders or lock files, understand what they do. Random cleanup can replace one clear error with several new ones.
Fix Common API and Authentication Problems
External services introduce another category of errors. A script may be correct while the API rejects a request because of authentication, billing, quotas or an unsupported parameter.
Authentication errors
Confirm that the environment variable name matches what the project expects and that the key belongs to the correct service. Avoid printing the complete key while debugging.
Quota or billing errors
A valid key can still fail when the account has no remaining quota or the required billing configuration is missing. Check the provider’s dashboard before changing project code.
Rate limits
If repeated requests fail only during heavy use, slow the workflow or implement retries according to the provider’s guidance. Do not create an uncontrolled retry loop.
Fix Remotion and Rendering Errors
Rendering combines code, assets, fonts and media, so failures can come from several sources.
Missing asset
If a composition references an image, audio file or font that does not exist at the expected path, correct the reference or restore the asset. Avoid absolute paths tied to one computer when the project is meant to be portable.
Text overflow
Generated text may be longer than the component was designed to display. Add character limits, wrapping rules or responsive font sizing. Better yet, instruct Claude to shorten the copy before rendering.
Render works in preview but fails in export
Check the export logs and verify that all resources are available to the rendering process. A browser preview can sometimes access something that the final renderer cannot.
File Management Rules That Prevent Beginner Mistakes
Good file organization is one of the easiest ways to make an automated workflow safer.
Never overwrite the camera original
Keep the source recording in a protected folder. Every edit should create a new output or reference the original non-destructively.
Use predictable names
Names such as master-cut-v01.mp4, master-cut-v02.mp4 and final-review.mp4 are easier to understand than several files called final-final-new.mp4.
Separate temporary files
Proxies, caches and test renders can live in a temporary directory. This makes it easier to archive only the assets you need after publishing.
Build a Human Review Loop Into Every Stage
Claude Code can accelerate production, but the creator remains responsible for the finished video. Review gates make that responsibility explicit.
Approve the clean cut
Do not add hours of graphics to a dialogue edit that has not been approved. Watch the clean cut first and correct pacing or meaning.
Approve visuals before final rendering
Check text, timing, brand consistency and factual accuracy. A polished animation can still communicate the wrong information.
Approve audio in context
Listen to voice, music and effects together. A sound that works alone may be too loud once dialogue is present.
Watch the final render from beginning to end
Automated checks can detect missing files or incorrect media properties, but they cannot replace a complete viewing pass.
Your First Week Learning Claude Code Video Editing
Day 1: Install and verify
Install the workspace, Claude Code and core dependencies. Stop after every installation and verify the command works.
Day 2: Explore the project
Open the repository, read its instructions and identify the main folders. Launch Claude in the project and ask it to explain the available workflow before changing files.
Day 3: Process a short recording
Use a one- or two-minute test clip. Generate the transcript and clean cut, then compare the result with the original.
Day 4: Add one visual component
Open Remotion Studio and customize a simple title or callout. Learn how text and timing are passed into the component.
Day 5: Test audio
Run the audio-cleanup stage and compare before and after. Add one or two effects only if they support the video.
Day 6: Package the video
Create title and thumbnail directions from the finished content. Verify that the packaging accurately represents the video.
Day 7: Rebuild from a fresh project
Start another small project without relying on memory from the first. Any step you cannot reproduce should be documented more clearly.
Beginner Prompt Patterns for Claude Code Video Editing
Good prompts explain the goal, constraints and desired review point. They do not need to dictate every implementation detail when the project already contains specialized instructions.
Ask Claude to plan before acting
Inspect this project and the video folder.
Explain which workflow you would use to create a clean first edit.
Do not modify files yet.
List the stages and any missing prerequisites.
Request a conservative clean cut
Create a proposed clean-cut plan for my test video.
Preserve complete thoughts and natural pauses.
Flag uncertain deletions for review.
Do not remove required explanations.
Request visual ideas
Review the approved transcript and identify moments
where a visual would improve understanding.
Prefer existing reusable components.
Keep talking-head sections when no visual is necessary.
Request a final QA pass
Check the final project for missing assets,
placeholder text, obvious timing problems,
incorrect file references and incomplete outputs.
Report issues before publishing anything.
These patterns keep the workflow collaborative. Claude proposes and executes bounded tasks while you retain control over editorial decisions.
When You Should Still Use a Traditional Video Editor
Claude Code is not the best interface for every editing problem. A traditional nonlinear editor can be faster when you need detailed manual color work, complex keyframing, precise visual compositing or highly improvisational timeline decisions.
A hybrid approach is often practical. Use Claude Code for transcript analysis, repetitive cuts, asset organization, captions and programmatic graphics. Then open the resulting master in your preferred editor for specialized finishing.
Choose the tool based on the task
The goal is not to prove that every editing action can be automated. The goal is to reduce repetitive work while preserving quality. If a manual adjustment takes thirty seconds and an automated solution takes an hour to debug, make the manual adjustment.
Beginner Security Checklist
Agentic tools can read and modify files within the permissions you provide. Keep the project scope narrow while learning.
- Work inside a dedicated project folder.
- Back up important source media.
- Keep API keys in private environment configuration.
- Do not commit secrets to a public repository.
- Read commands before approving destructive operations.
- Keep public publishing behind a manual approval step.
- Revoke any credential that is accidentally exposed.
These habits are simple, but they become increasingly important as your workflow gains access to more services and files.
How to Keep Your First Claude Code Video Editing Tests Affordable
Start with short clips and low-volume tests. A one-minute video can reveal most setup problems without consuming the resources required by a thirty-minute production.
Test locally before calling paid services
Verify folders, FFmpeg and Remotion with local assets first. Then connect transcription, voice or image APIs one at a time.
Preview at lower quality
During development, lower-resolution previews can save rendering time. Use your target delivery quality for the approved final render.
Track which service produced each charge
If several APIs are connected, keep a simple note of what each stage uses. This makes it easier to understand costs and disable optional services you do not need.
Complete Beginner Checklist: From Empty Computer to First Edited Video
Installation
- Install and open Visual Studio Code.
- Install Claude Code using current official instructions.
- Install Python and verify the command.
- Install Node.js and verify Node and npm.
- Install FFmpeg and verify it from a fresh terminal.
Project setup
- Download or clone the video editor project.
- Open the project folder in VS Code.
- Create the Python virtual environment.
- Install Python requirements.
- Install Remotion dependencies.
- Create the local environment configuration.
- Add only the API credentials needed for your test.
First edit
- Create a small video project folder.
- Copy in a short raw recording.
- Launch Claude from the project root.
- Ask Claude to explain its plan before changing files.
- Create and review the clean cut.
- Add a small number of visual beats.
- Process and compare the audio.
- Add sound effects only where useful.
- Generate packaging ideas from the finished content.
Final review
- Watch the entire render.
- Verify captions and on-screen text.
- Check audio synchronization and levels.
- Confirm there are no placeholder assets.
- Verify the title and thumbnail are accurate.
- Keep public publishing behind final approval.
If you can complete this checklist twice on two different short recordings, you have moved beyond a one-time demo. You now have the foundation of a repeatable beginner workflow.
More Questions Beginners Ask About Editing Videos With Claude Code
Do I need a powerful computer?
You can learn the workflow on a typical modern development computer, but long or high-resolution renders benefit from faster hardware and more storage. Start with short clips to evaluate your system.
Do I need Git?
Not necessarily for a first test if the project offers a downloadable ZIP. Git becomes useful when you want easier updates and version control.
Do I need Python and Node.js?
If the project uses both Python automation and Remotion, yes. They serve different parts of the workflow.
Why does Claude work but my edit fail?
Claude Code may be installed correctly while another dependency is missing or misconfigured. Check the specific command or tool named in the error.
Can I use my existing YouTube footage?
Yes, provided you have the necessary rights and access to the source file. For learning, duplicate the footage into a test project rather than modifying your only copy.
Can I edit vertical videos?
Yes, if your Remotion compositions and processing settings support the vertical aspect ratio. Design text and framing specifically for mobile viewing.
Can I keep using Premiere Pro or DaVinci Resolve?
Yes. Claude Code can handle selected automation tasks while a traditional editor remains part of the finishing workflow.
What is the safest first automation?
Planning, transcript analysis and file organization are low-risk starting points because you can review the output before media files change.
How long should my first test video be?
One to three minutes is usually enough to test transcription, cuts, visuals and audio without making every experiment expensive or slow.
What should I do after the first successful edit?
Repeat the process on a second video, document anything you forgot, and begin turning successful settings into reusable project defaults.
Walkthrough: Edit a Real Beginner YouTube Video From Start to Finish
After your short technical test succeeds, create a slightly more realistic project. Imagine you recorded an eight-minute tutorial explaining a software feature. The recording contains a repeated introduction, two mistakes, several pauses and three moments where the viewer needs to see the screen.
Step 1: Copy the recording into a new project
Create a fresh video folder and copy the original file into it. Do not move the only copy from your camera archive. Give the project a clear name related to the topic rather than calling it simply “video-2.”
Step 2: Generate and inspect the transcript
Before asking for cuts, read the transcript. Correct the software name and any commands that speech recognition misunderstood. Mark the three places where a screen demonstration is required.
Step 3: Ask for a proposed edit
Tell Claude to identify obvious retakes, repeated ideas and unusually long dead sections while preserving complete explanations. Ask it to report uncertain edits separately. Review that plan before generating the master cut.
Step 4: Render the clean dialogue version
Create the cleaned video and watch it without graphics. If the pacing works at this stage, later visual work is built on a strong foundation. If it feels rushed, correct the dialogue edit now.
Step 5: Add the three demonstrations
Use the transcript timestamps to position the relevant browser or screen visuals. Keep each demonstration visible long enough for the viewer to understand what changed.
Step 6: Add simple branded graphics
Include only the title card, a key-point callout and perhaps a final next-step card. Your goal is to learn the workflow, not to test every animation component in one video.
Step 7: Clean and mix the audio
Process the dialogue, compare it with the original, and then add music only if it supports the tutorial. Keep the voice clearly dominant.
Step 8: Generate packaging after the edit
Ask for title and thumbnail concepts based on the actual finished tutorial. Reject ideas that promise features or results that the video does not show.
Step 9: Perform final quality control
Watch the entire render. Check every command on screen, every transition into a demonstration and the synchronization of processed audio. Once this works, you have completed a real end-to-end project.
How to Improve Your Instructions When Claude Misunderstands the Edit
Sometimes the tools work correctly but the result is not what you wanted. In that case, the problem may be the instruction rather than the installation.
Describe the outcome instead of vague adjectives
“Make it better” gives Claude very little direction. Instead, explain that you want to remove obvious retakes, preserve thoughtful pauses, keep all tutorial steps and shorten the introduction without changing its promise.
Provide examples from the current project
If one cut is exactly right, point to it as a model. If another cut is too aggressive, explain why. Concrete feedback is easier to turn into a reusable rule.
Ask for a plan when the task is complex
For a long operation, ask Claude to inspect the relevant files and explain its proposed actions before executing them. This can expose a wrong assumption while correction is still cheap.
Limit the scope of a correction
If only one graphic is wrong, ask to fix that component or scene rather than regenerate the complete video. Narrow instructions reduce unintended changes.
Make the Beginner Workflow Faster Without Making It Fragile
Once your setup is stable, you can reduce waiting time. However, performance optimization should come after correctness.
Use short test ranges
When developing a visual or audio process, run it on a small section first. A thirty-second test can reveal the same configuration problem as a thirty-minute render.
Reuse completed intermediate files
If the transcript has already been approved, do not regenerate it every time you change a title card. Organize outputs so later stages can reuse earlier approved work.
Keep generated previews separate
Low-resolution preview renders are useful during development. Store them separately from final exports so you do not accidentally upload a draft.
Close unnecessary heavy applications
Video rendering can consume significant memory and processor resources. If your computer struggles, close applications you do not need during the render and avoid running several heavy jobs simultaneously.
Add Accessibility to Your Claude Code Video Editing Workflow
Accessibility should be part of the production plan rather than an afterthought. The transcript already gives you a strong foundation for captions.
Correct captions before publishing
Review names, technical terms and punctuation. If the tutorial contains commands, make sure captions do not change characters that matter.
Keep on-screen text readable
Use sufficient contrast, reasonable font sizes and enough display time. Remember that many viewers watch on small screens.
Do not communicate essential information only through color
If a graphic compares success and failure, use labels or icons in addition to color differences. This makes the information clearer for more viewers.
Consider descriptive narration
When an important action happens silently on screen, the narration should explain it when practical. This also improves the tutorial for viewers who are listening while not looking continuously at the screen.
How to Update the Project Without Breaking Your Working Setup
Once you have a working environment, updates should be deliberate. A newer repository version or package can add useful features, but it can also change dependencies or instructions.
Back up your working configuration
Before a major update, save your project code and note the versions that currently work. Do not include secret API values in a public backup.
Read the project’s changes
If you use Git, inspect incoming changes before merging them into a heavily customized workflow. If you downloaded a ZIP, compare the new version with your customized copy rather than overwriting it immediately.
Test updates on a sample video
Use a small known project to verify transcription, clean cuts, graphics and rendering after an update. Only then move an important production to the new environment.
What to Learn Next After Your First Successful Claude Code Edit
Once installation and the first edit no longer feel difficult, expand your skills in an order that produces practical benefits.
Learn basic FFmpeg concepts
You do not need to memorize hundreds of options. Understanding streams, codecs, resolution, frame rate and trimming will help you interpret many media errors.
Learn basic Git
Version control makes it safer to customize scripts and Remotion components. Learn status, diff, commit and how to restore a known working version.
Learn basic JavaScript and React concepts for Remotion
A little knowledge of components, props and arrays makes visual customization much easier. You can then ask Claude for changes while understanding the structure it modifies.
Learn enough Python to read automation scripts
Focus on variables, functions, file paths, lists and error handling. The goal is not to become a software engineer overnight; it is to understand the scripts that operate on your media.
Learn editorial judgment continuously
Technical automation does not decide what makes a compelling video. Study pacing, explanation, storytelling, visual hierarchy and audience retention alongside the tools.
Create a Reusable Starter Template for Future Videos
After several successful tests, create a clean starter project that contains your approved folder structure, configuration examples, brand components and documentation but no old source footage.
Include a README for yourself
Write the exact sequence you follow to start a video, including where to place footage, how to launch Claude, which stage comes first and how to perform final QA. A good README prevents you from depending on memory.
Include safe example configuration
Keep variable names and placeholders but never real API keys. This allows you to duplicate the template without risking credential exposure.
Include approved visual components
Store your title card, lower third, callout and other standard components in the template. New projects then inherit a consistent visual foundation.
Keep a changelog
When you improve the template, record what changed. If a future modification causes trouble, the changelog can help you identify the difference.
Publish Your First AI-Assisted Edit Safely
The final step deserves its own process. Do not make a video public simply because the render command succeeded.
Upload as private or unlisted first
This gives the platform time to process the video and lets you inspect the actual streaming result. Check picture quality, audio, captions and chapter behavior.
Review the description
Make sure resource links work and required disclosures are present. Remove temporary notes or placeholder links that may have been used during drafting.
Check the thumbnail in context
Preview it at small size and make sure it is still understandable. Confirm that it represents the video’s real content.
Archive the final project
After publishing, preserve the final transcript, master render, thumbnail source, caption file and project configuration you would need for a future update.
Ten Rules to Remember When Editing Videos With Claude Code
- Verify one tool at a time. A working Claude installation does not prove Python, Node, Remotion or FFmpeg are configured correctly.
- Start with a short recording. Small tests make errors cheaper and easier to understand.
- Protect the original footage. Every automated workflow should be reversible.
- Ask for a plan before a large change. Catching a wrong assumption is easier before rendering begins.
- Review transcript-based cuts. Silence, repetition and pauses are editorial decisions, not merely technical measurements.
- Use visuals to explain. Do not add motion graphics simply because the system can generate them.
- Keep dialogue clear. Music, effects and aggressive audio processing should never overpower the speaker.
- Keep credentials private. Environment files and API keys do not belong in public repositories or screenshots.
- Watch the complete final render. Automated checks cannot judge every pacing, meaning or presentation problem.
- Document what works. A repeatable workflow becomes more valuable every time you turn a successful fix into a reusable rule.
The main lesson is that learning how to edit videos with Claude Code is not about replacing every familiar editing tool immediately. It is about creating a controlled environment where an AI agent can coordinate repetitive production work while you keep authority over the creative result. Begin with setup, learn each dependency, complete one small project and only then add more automation. That approach is slower for the first hour but much faster over the next hundred videos.




Pingback: Claude Code Video Editing: From Raw Recording to Published one