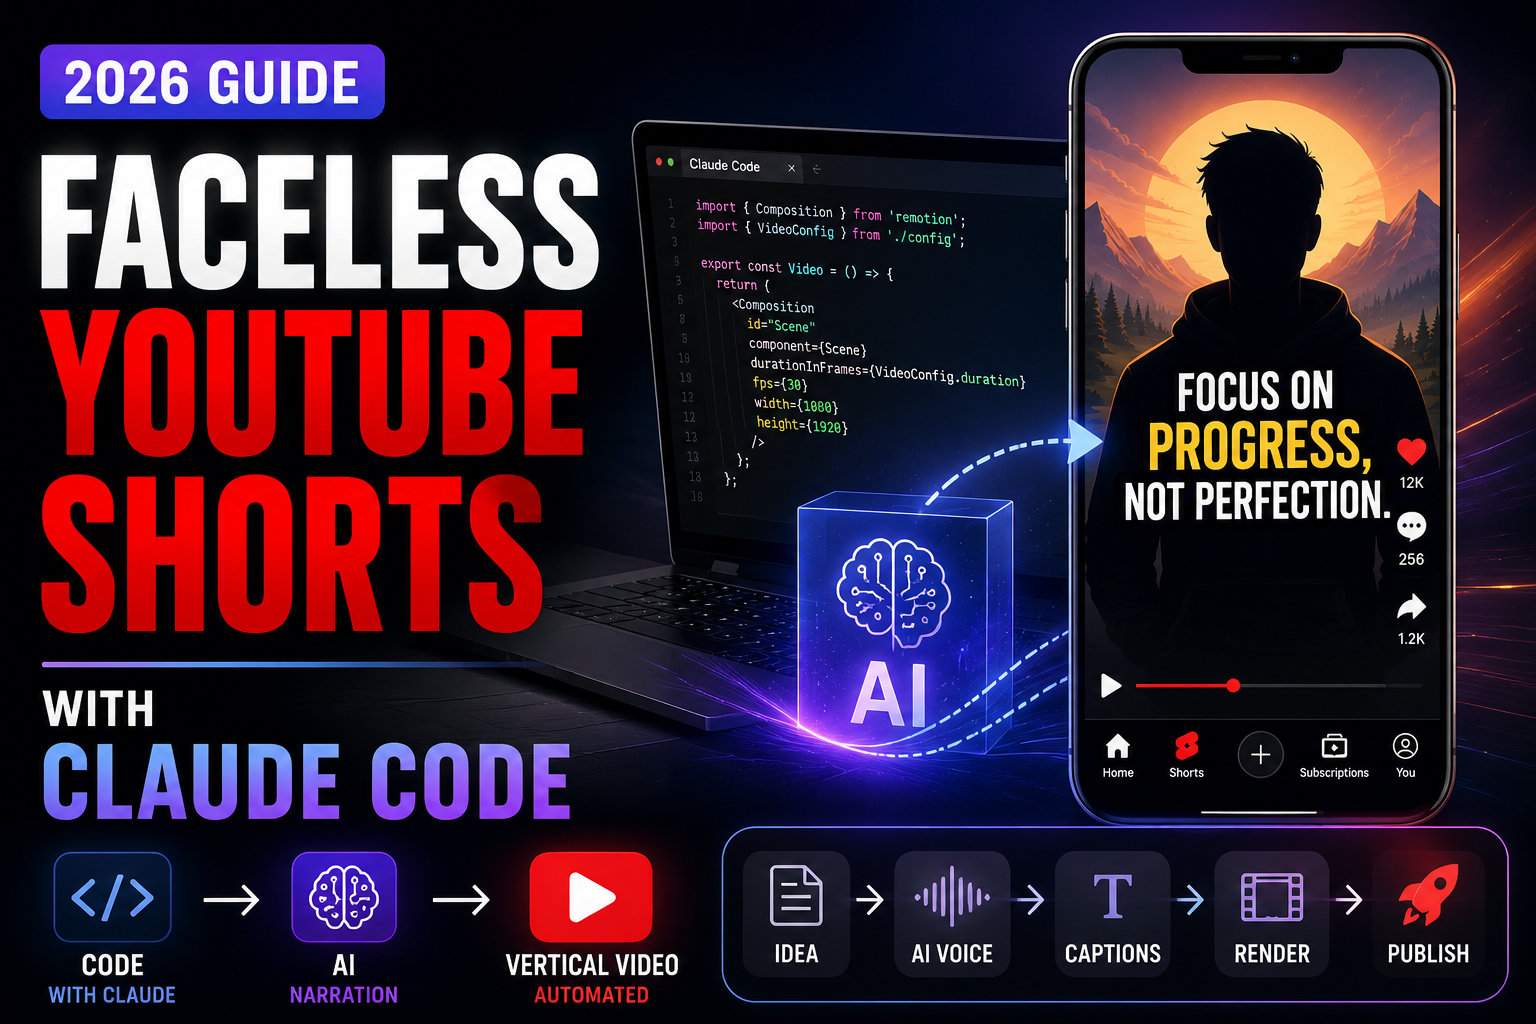
Build faceless YouTube Shorts with Claude Code using a repeatable 9:16 workflow for scripting, Remotion animation, AI narration, branding, fact-checking and final rendering.
A structured project Claude Code can understand and improve.
Content designed around mobile viewing and YouTube Shorts.
Optional voice generation without recording yourself.
Hook, setup, tension, reveal, payoff and optional loop.
How the faceless Shorts system works
Traditional production separates scripting, graphics, narration and editing. A code-based workflow connects those stages inside one reusable project. You describe the audience, topic, duration and visual direction; Claude Code works with the project files; Remotion turns the programmed composition into video.
Define the topic, viewer, duration, visual style and lesson.
Claude can inspect files, create components and adjust timing.
The React composition becomes a playable video file.
Approve the script, facts, visuals, audio and final output.
What you need before starting
| Tool | Purpose |
|---|---|
| Visual Studio Code | Workspace for files and terminal commands. |
| Claude Code | AI coding agent that works with the video project. |
| Node.js | Runs the JavaScript/React environment. |
| Remotion | Creates programmatic video with React. |
| FFmpeg | Useful for media processing and encoding. |
| ElevenLabs | Optional AI narration and voice workflows. |
Step 1: Install Visual Studio Code
Use VS Code as the workspace that keeps your project files and terminal together. Create a dedicated folder for your Shorts channel so your brand rules, components, scripts and assets stay organized.
Get Visual Studio Code →Step 2: Install Claude Code
Follow Anthropic’s current official Claude Code installation instructions for your operating system. After installation, verify the command in a new terminal.
claude --version
claude
Explore Claude Code →
Step 3: Create your faceless YouTube Shorts project
Your project can eventually contain brand colors, fonts, caption styles, animation components, narration settings, scripts, reusable sounds and rendered videos.
faceless-youtube-shorts/
├── brand-guide.md
├── video-ideas.md
├── assets/
├── audio/
├── src/
└── renders/
Store your creative rules in files Claude can read. That turns your channel style into reusable instructions rather than something you must explain again for every Short.
Step 4: Set up Remotion for vertical video
Remotion represents video timing and animation as React code. That makes it suitable for Claude Code because the agent can inspect and modify the same files that generate the finished video.
npx create-video@latest
For a typical YouTube Short, start with a 1080 × 1920 vertical composition using a 9:16 aspect ratio. Test a simple scene before building complex animation.
Step 5: Add AI narration
A faceless channel does not have to be voiceless. Text-to-speech can turn an approved script into narration. Keep private API credentials in environment variables and never publish real keys in your code, screenshots or WordPress content.
ELEVENLABS_API_KEY=your_private_key_here
Affiliate disclosure: the ElevenLabs link above is an affiliate link. I may earn a commission if you purchase through it, at no additional cost to you.
Step 6: Ask Claude to plan your first Short
A detailed production brief works better than simply asking Claude to “make a Short.” Give it the subject, audience, duration, style and required story beats, then ask for a plan before implementation.
Create a 35-second 1080×1920 faceless YouTube Short.

TOPIC: Why airplanes stay in the air
AUDIENCE: General viewers
STYLE: Modern educational animation
STRUCTURE:
1. Hook
2. Setup
3. Visual explanation
4. Surprising fact
5. Payoff
6. Optional loop

Before coding, show me:
- narration script
- scene-by-scene storyboard
- timing plan
- visual assets needed

Wait for approval before rendering.
The short-form content formula
Create curiosity immediately. Avoid a slow logo introduction.
Give only the context needed to understand the question.
Create a reason for the viewer to continue watching.
Explain the idea through fast, understandable visual steps.
Deliver what the opening promised.
When useful, make the ending flow naturally toward the opening.
Design faceless YouTube Shorts for phones
A 1080 × 1920 render is still viewed on a relatively small screen. Use large captions, clear contrast and obvious focal points. Keep essential text and graphics away from edges where platform interface elements may overlap them.
Most importantly, make the first frame useful. A surprising number, visual puzzle, bold question, comparison or moving diagram gives the viewer something to process immediately.
Useful Claude Code prompts
Educational Short
Create a 40-second educational Short explaining compound interest.
Use one animated example starting with $1,000.
Use large numbers and a simple animated chart.
Show me the script and storyboard before making changes.
Technology Short
Create a vertical Short showing what happens after someone types a website address:
browser → DNS → server → response → webpage.
Audience: beginners.
Use animated arrows, simple icons and mobile-friendly text.
Improve an existing Short
Review this Remotion Short without changing files yet.
Identify:
1. a weak first 3 seconds
2. text that is too small
3. scenes that stay static too long
4. unnecessary narration
5. visuals that do not match the spoken line
6. opportunities for a stronger ending or loop
Create a recognizable channel style
Do not let every generated video look like it came from a different channel. Store a simple brand specification in a file such as brand-guide.md and instruct Claude to reuse it.
FORMAT: 1080×1920
STYLE: clean educational motion graphics
HEADLINES: bold
CAPTIONS: large and mobile friendly
TRANSITIONS: fast but smooth
AVOID: clutter, tiny text and unnecessary visual effects
Three faceless production styles
Charts, diagrams, numbers, maps, icons and typography animated with Remotion.
Licensed or generated images combined with motion, masks, captions and narration.
AI-generated clips combined with programmable branding and text.
Mix code graphics, images and short generated clips when each format adds value.
How to scale the workflow
After one Short works, improve the reusable system rather than immediately creating dozens of unrelated templates. Save components such as hook cards, animated charts, comparison panels, caption layers, progress bars and end-loop scenes.
Also maintain an ideas file and a production checklist. Before final rendering, verify the hook, mobile readability, narration timing, spelling, factual accuracy, audio levels, asset rights and visual safe areas.
Fact-check before publishing
Automation can increase production speed, but it can also increase the speed at which errors are published. Verify important claims—especially finance, health, science, legal, historical and current-event claims—against reliable sources before publishing.
Copyright still matters on faceless channels
Faceless content is not automatically copyright-free. Make sure you have permission or an appropriate license for photographs, footage, music, illustrations and sound effects. Code-generated graphics can reduce dependence on copied third-party visuals, but you still need to review every asset in the final video.
What does this workflow cost?
VS Code and many development tools can be used free of charge, while Claude Code and optional AI services may involve plans or usage charges. Pricing changes, so check each provider directly before estimating production costs at scale.
Recommended beginner workflow
Start with one 30–40 second educational video. Render it, watch it on a real phone and improve the reusable template before producing the next video.
Start With a Faceless YouTube Shorts Channel Strategy
First, a production system becomes much easier to scale when the channel has a clear promise. Before generating scripts or animations, decide who the Shorts are for, what recurring problem they solve and what kind of information viewers should expect from one upload to the next.
Choose a narrow audience before a broad topic
A channel about “technology” is difficult to position because almost anything could fit. A channel explaining useful AI tools to small-business owners is easier to understand. Likewise, a finance channel can focus on beginner money concepts rather than trying to cover every market headline.
Define three to five repeatable content pillars
Content pillars reduce idea fatigue. For example, an educational AI channel might use quick definitions, tool demonstrations, myth-versus-fact videos, workflow tips and short case studies. Claude can then generate ideas inside those boundaries instead of producing an unrelated list every time.
Create a channel promise
Write one sentence describing the value viewers receive. Then, keep it in the project documentation so every proposed Short can be checked against it. If an idea does not serve the promise, save it for another channel rather than weakening the identity of this one.
How to Find Faceless YouTube Shorts Ideas Worth Producing
However, automation makes production faster, but it does not make a weak topic interesting. Build an idea-selection process before building a rendering pipeline.
Start with real audience questions
Look at questions in your comments, search suggestions, community discussions, product documentation and problems people repeatedly ask you to explain. A specific question usually creates a stronger Short than a generic request for “viral ideas.”
Score ideas before production
Create a simple score for curiosity, usefulness, visual potential and fit with your channel. A topic that is difficult to explain visually may still work, but it should have an unusually strong story or payoff.
Build an idea database
Store the topic, hook, source notes, pillar, status and production date. This prevents duplicates and gives Claude structured context when you ask for the next batch of concepts.
Research and Fact-Check Before Writing the Short
Most importantly, faceless content still needs editorial responsibility. If the Short teaches a fact, statistic, historical event, financial concept or product feature, verify it before turning it into narration.
Separate source notes from the script
For clarity, keep research notes in a dedicated file. Record the source, date accessed and the specific claim it supports. Then ask Claude to write only from approved notes when accuracy matters.
Prefer primary sources for important claims
Official documentation, government data, original research and first-party product information are often better foundations than copied summaries. Secondary sources can provide context, but trace important numbers back to their origin when practical.
Flag uncertain claims instead of inventing certainty
If the available evidence is mixed or incomplete, change the script. A thirty-second video does not need to pretend every topic has one simple answer.
Write Better Hooks for Faceless YouTube Shorts
Therefore, the opening should create a reason to continue watching without misleading the viewer. A strong hook introduces a question, tension, unexpected contrast or useful promise that the rest of the Short actually resolves.
Use a curiosity gap with a real payoff
“This tiny design choice saves airlines millions” can work if the video identifies the design choice and explains the mechanism. If the payoff never arrives, the hook becomes empty clickbait.
Lead with the result when speed matters
For tutorials, show what the viewer will accomplish before explaining the steps. A quick finished example can establish value immediately.
Remove introductions that do not earn their time
Shorts usually do not need a long greeting, channel biography or explanation that you are about to explain something. Begin with the idea.
Build a Repeatable Short-Form Script System
For example, a reusable structure gives Claude constraints while leaving room for different topics. One practical model is hook, context, development, reveal, payoff and optional loop.
Hook
Open with the strongest unanswered question or useful result. Keep it specific enough that the viewer understands what is at stake.
Context
Give only the background required to understand the next line. Every sentence should move the explanation forward.
Development
Introduce the mechanism, steps or evidence. This is where visuals should do part of the explanatory work instead of forcing the narration to carry everything.
Reveal and payoff
Answer the opening question clearly. Do not hide the answer behind a generic call to action.
Optional loop
A loop can connect the final image or phrase to the opening, but it should feel natural. Do not sacrifice clarity merely to force a seamless replay.
Control the Word Budget and Pacing
In addition, short-form narration must fit the available time. Instead of writing a long script and accelerating the voice unnaturally, set a word budget early and test the actual narration duration.
Write for spoken language
Short sentences, concrete nouns and direct verbs are easier to follow. Read the script aloud or generate a draft voice track before building detailed animation.
Leave room for comprehension
Not every second needs speech. A brief visual pause can help the viewer process a diagram, number or transformation.
Cut duplicate meaning
If two sentences make the same point, keep the stronger one. Short-form editing rewards precision more than completeness.
Turn the Script Into a Scene-by-Scene Storyboard
Next, before coding, divide the narration into visual beats. Each beat should have a start time, approximate duration, narration segment, visual purpose and component or asset.
Give every scene a job
A scene may establish context, demonstrate a process, show evidence, compare values or deliver the payoff. If it has no clear job, consider removing it.
Match visual change to meaning
Do not change scenes on an arbitrary timer. Change when the idea changes or when attention genuinely needs a reset.
Review the storyboard before rendering
A text storyboard is cheap to change. A completed animation is not. Ask Claude to present the plan first, then approve it before the project generates narration and visuals.
Design a Reusable Remotion Architecture for Shorts
Moreover, the biggest advantage of code-first video is reuse. Instead of building each Short as a unique timeline, create components that accept structured data.
Create a master vertical composition
Use a 1080 by 1920 composition and define standard safe areas, caption positions and brand margins. Individual Shorts can change duration while inheriting the same layout rules.
Build reusable components
Useful components include headline cards, number counters, comparison panels, quote cards, timelines, charts, progress indicators, browser frames and call-to-action cards.
Separate content from presentation
Pass text, numbers and timing into components rather than hard-coding one video’s content. Then Claude can build a new Short mostly by creating structured scene data.
Create Captions That Work on a Phone Screen
Likewise, captions are especially important for vertical video because viewers may encounter a Short without sound. They should be readable, synchronized and visually subordinate to the main idea.
Keep caption chunks short
Break narration into phrases rather than displaying full paragraphs. The viewer should be able to read the caption while also following the visual.
Protect interface safe zones
Platform controls, descriptions and buttons can cover parts of a vertical video. Keep critical words away from edges and crowded interface areas.
Highlight selectively
Emphasizing one important word can help scanning. Highlighting every word with constant motion can become distracting.
Choose and Direct AI Narration Carefully
Meanwhile, AI narration can remove the need to record a microphone, but voice selection still affects channel identity. Choose a voice that fits the subject and keep its settings consistent across videos.
Generate narration only after script approval
Changing a sentence after generating audio creates unnecessary work. Approve facts, wording and pronunciation first.
Create a pronunciation guide
Names, acronyms and technical terms may require special handling. Keep a channel glossary so recurring terms sound consistent.
Avoid unnatural speed
If the voice must race to fit the timeline, shorten the script. Comprehension matters more than squeezing in one additional fact.
Build a Simple Audio System for Shorts
Above all, dialogue should remain the center of an educational Short. Music and effects can support rhythm, but they should not compete with narration.
Use music as a bed, not the message
Select tracks with enough space for speech. Reduce the level during narration and avoid sudden changes that distract from the explanation.
Add sound effects to meaningful events
A counter reaching a target, a card snapping into place or a reveal can benefit from a subtle effect. Constant effects quickly lose impact.
Keep licensing records
Store the source and usage terms for music and sound assets. Do not assume an asset is safe to monetize because it was easy to download.
Five Faceless YouTube Shorts Visual Styles
1. Animated typography
Large text, numbers, shapes and simple transitions work well for facts, definitions and quick explanations.
2. Diagram-driven explainers
Use arrows, labeled parts and simple diagrams for science, finance, technology and process education.
3. Image documentary style
Combine licensed or appropriately sourced images with camera movement, masks, texture and narration. Maintain source records for third-party assets.
4. Screen-demo Shorts
Show a software workflow, website feature or code result. Crop deliberately for vertical viewing instead of shrinking an unreadable desktop screen.
5. Generative visual stories
Generated imagery or video can support fictional, conceptual or illustrative storytelling. Maintain visual continuity and review whether YouTube’s AI disclosure rules apply to realistic synthetic material.
Create a Recognizable Faceless Channel Brand
As a result, viewers should begin recognizing the channel before reading the username. Consistency comes from repeated design decisions, not from making every Short identical.
Define colors and typography
Choose a compact palette and a small font system. Record exact values in the brand guide so Claude does not improvise a new look for each render.
Define motion behavior
Set standard animation speeds, easing styles and transition types. This gives the channel a visual rhythm.
Define voice and writing style
Document whether narration is energetic, calm, analytical, humorous or conversational. Include examples of language you want to use and avoid.
Organize Your Faceless Shorts Production Files
faceless-youtube-shorts/
  brand/
  ideas/
  research/
  scripts/
  src/
  components/
  assets/
    images/
    icons/
    music/
    sfx/
  audio/
  captions/
  renders/
  publish/
  logs/
Consequently, a predictable structure helps Claude find assets and makes each project easier to archive. Keep source research and approved scripts separate from temporary render files.
Use a manifest for each Short
The manifest can store topic, duration, script version, voice, asset list, composition, render path, disclosure status and publication URL. That gives the workflow one source of truth.
Batch Faceless YouTube Shorts Without Mass-Producing Junk
In practice, batching is useful when it reduces repeated setup. It becomes harmful when dozens of videos are produced from the same shallow template with little original value.
Batch research by content pillar
Research several related questions at once, but keep sources and claims attached to the correct video.
Batch reusable production tasks
You can prepare caption styles, voice settings and component presets once. However, each script should still have its own reason to exist.
Review every final video
Automation does not remove the need for editorial review. YouTube’s monetization policy emphasizes original and authentic content and identifies repetitive or mass-produced material as inauthentic content that may be ineligible for monetization.
Keep Faceless Shorts Original Enough to Build a Real Channel
Nevertheless, “Faceless” should describe the presentation, not the absence of original contribution. A channel can be faceless while still containing original research, writing, explanations, graphics and editorial judgment.
Do not scrape and repackage other creators
Copying clips, scripts or compilations and making only superficial changes creates copyright and monetization risks. Build from your own angle and appropriately licensed materials.
Add meaningful educational or entertainment value
Your explanation, analysis, story structure, visualization and examples should give viewers something they would not receive from the source material alone.
Make authorship visible through consistency
A recognizable visual language, recurring formats and clear channel description can help viewers understand what you create.
Understand YouTube’s AI Disclosure Rules in 2026
In other words, AI-assisted production does not automatically require the same disclosure in every situation. YouTube’s current guidance distinguishes production assistance and minor or non-realistic edits from realistic content that is meaningfully generated or altered.
Production assistance may not require disclosure
YouTube lists examples such as using generative AI to help with an outline, script, thumbnail, title, infographic or captions among cases that do not necessarily require disclosure. It also lists cloning your own voice for voiceovers or dubs as an example that does not require disclosure.
Realistic synthetic material can require disclosure
If AI makes a real person appear to do something they did not do, alters footage of a real event or place, or creates a realistic scene that did not occur, YouTube requires the creator to use its AI disclosure setting.
Disclosure itself is not a monetization penalty
YouTube states that disclosing qualifying AI content does not by itself limit audience reach or monetization eligibility. The safer approach is to follow the current Studio disclosure workflow rather than hiding realistic synthetic content.
Can Faceless AI YouTube Shorts Be Monetized?
Therefore, using AI does not automatically make a channel ineligible for monetization. The more important question is whether the channel meets YouTube’s monetization policies and provides original, authentic value.
Avoid repetitive mass-produced content
YouTube clarified its “inauthentic content” policy to include repetitive or mass-produced material. Therefore, scaling should mean reusing production infrastructure while still producing distinct videos, not generating hundreds of nearly identical uploads.
Be careful with reused material
When using material from elsewhere, significant original commentary, substantive modification or educational or entertainment value matters. Copyright requirements still apply separately.
Build for viewers before monetization
A channel that viewers repeatedly choose to watch is a stronger business than one designed only to pass a policy checklist.
Use YouTube Analytics to Improve the Shorts System
Afterward, use performance data as feedback for future scripts and visuals. Do not change the entire strategy because of one upload.
Compare hooks
Group videos by opening style and look for patterns over a meaningful sample. A question hook may work better for one topic while a demonstration works better for another.
Study retention in context
A drop can indicate a confusing sentence, slow setup or visual mismatch. Rewatch that exact moment before deciding what caused it.
Track topic performance separately from editing style
A strong topic can outperform despite average editing. Keep enough notes to distinguish topic selection from production improvements.
Create a Practical A/B Testing Mindset
Similarly, short-form growth often comes from many small improvements. Test one meaningful variable at a time when possible.
Compare opening structures
Compare result-first openings, questions, surprising facts and visual demonstrations across similar topics.
Experiment with caption density
Some audiences prefer full captions; others respond better to selective emphasis. Make readability the baseline.
Test duration honestly
Do not stretch a simple idea merely to hit a target length. Let the content determine the appropriate duration.
Faceless YouTube Shorts Niches That Fit Programmatic Video
Educational explainers
Science, math, history and technology work well because diagrams and animated text can carry much of the visual explanation.
Personal finance education
Charts, examples and simple number animations can explain concepts, but financial claims should be carefully sourced and framed responsibly.
Software and AI tutorials
Screen demonstrations, browser frames and code components can show practical workflows without a talking head.
Data storytelling
Rankings, timelines and comparisons can become reusable visual components. Verify the underlying dataset and show enough context to avoid misleading comparisons.
Productivity and business concepts
Frameworks, process diagrams and before-and-after examples can work well in a clean motion-graphics style.
Complete Faceless YouTube Shorts Workflow: Idea to Upload
- Choose the idea: select a topic with clear audience value and visual potential.
- Research: gather reliable source notes and verify important claims.
- Write the hook: create curiosity or a useful promise that the video will actually resolve.
- Draft the script: use a concise hook-to-payoff structure.
- Approve facts: correct names, numbers and uncertain claims.
- Storyboard: map narration to visual beats and reusable components.
- Generate narration: create the voice track only after script approval.
- Build scenes: use Remotion components and approved assets.
- Add captions: synchronize readable mobile-first caption chunks.
- Mix audio: keep narration dominant over music and effects.
- Preview: watch the entire vertical composition at normal speed.
- Check disclosures: determine whether realistic AI-generated or altered material requires YouTube’s AI disclosure setting.
- Render: export the approved 9:16 master.
- Upload: add accurate metadata and publish after final review.
- Measure: record performance and lessons for the next production.
Quality-Control Checklist Before Publishing a Faceless Short
Editorial
- The opening promise matches the payoff.
- Important factual claims have been verified.
- No sentence is included only to fill time.
- The final video adds original value.
Visual
- Critical text is readable on a phone.
- Safe zones protect important content from interface overlays.
- Animations support meaning rather than distract from it.
- No placeholder asset or debug label remains.
Audio
- Narration is clear and synchronized.
- Music and effects remain below the voice.
- Pronunciations and names are correct.
Publishing
- Title and description accurately describe the Short.
- Asset rights and licenses have been checked.
- Required sponsorship or affiliate disclosures are present.
- YouTube’s AI disclosure setting has been handled when applicable.
Common Faceless YouTube Shorts Mistakes
Automating before finding a format that works
Do not build a complex factory around an untested content idea. Produce several strong Shorts manually or semi-automatically first.
Using the same template with different nouns
Repetition may make production efficient but can make the channel feel mass-produced. Reuse components while varying the actual story, examples and visual reasoning.
Writing for text instead of speech
Dense sentences that read well in an article can be difficult to follow in a fast voiceover. Write for the ear.
Overloading the screen
One strong visual idea is usually better than five competing elements on a phone-sized frame.
Ignoring rights and disclosures
Faceless production still involves copyright, licensing, sponsorship and AI-transparency responsibilities.
A 30-Day Plan to Build Your Faceless Shorts System
Week 1: Build the foundation
Choose the channel promise, three content pillars, visual palette, narration style and basic Remotion project. Produce one test render before adding advanced automation.
Week 2: Publish several controlled experiments
Create Shorts using different hooks while keeping the overall quality standard consistent. Record what was easy, slow or unreliable.
Week 3: Turn repeated work into components
Convert successful title cards, captions, diagrams and transitions into reusable components. Document your research and fact-checking process.
Week 4: Connect the workflow
Let Claude coordinate more of the repetitive stages, but keep approval gates before narration, final rendering and publishing. Review analytics and update the channel playbook.
Claude Code Prompt Templates for Faceless YouTube Shorts
Idea evaluation prompt
Review these Short ideas for my channel.
Score each for:
- audience fit
- curiosity
- usefulness
- visual potential
- originality

At this stage, do not write scripts yet.
Explain why the strongest three deserve production.
Research-to-script prompt
Use only the approved research notes in this project.
Draft a concise YouTube Short script.
Flag any claim that is not directly supported.
Do not invent statistics or quotations.
Storyboard prompt
Turn the approved narration into visual beats.
For each beat provide:
- start time
- duration
- narration
- visual purpose
- existing component to reuse
- new asset required

For now, do not render yet.
Quality-control prompt
Inspect the final Short project.
Report:
- placeholder text
- missing assets
- unsupported factual claims
- unreadable caption risks
- timing problems
- disclosure questions
- inconsistent brand styles

Finally, do not publish anything.
Advanced FAQ About Faceless YouTube Shorts
Do faceless Shorts need an AI voice?
No. You can use your own narration, licensed narration, text-only formats or other audio approaches. Faceless simply means you do not need to appear on camera.
Can I monetize a faceless AI channel?
AI use by itself does not automatically prevent monetization. You still need to satisfy YouTube’s channel monetization policies, including expectations around original and authentic content.
Does every AI-assisted Short need an AI label?
No. YouTube distinguishes between production assistance or minor/non-realistic uses and realistic content that is meaningfully generated or altered. Check the current disclosure rules for the specific content you publish.
Should I post hundreds of automated Shorts?
Volume should not replace originality or quality. YouTube’s monetization guidance identifies repetitive or mass-produced content as inauthentic content, so build a system that helps you create distinct, useful videos.
Can I use stock footage?
Yes when you have the appropriate rights, but stock footage alone does not make a video original. Your writing, editing, commentary, structure and visual treatment should add meaningful value.
Is Remotion required?
No. It is useful for code-driven repeatable video, but other editors and rendering systems can also produce faceless Shorts.
How many reusable components should I build?
Start with the components your first few videos actually need. Add new ones when a pattern repeats rather than creating a huge library before publishing anything.
What is the best length for a Short?
Use the length required to deliver the idea clearly. Do not pad a simple concept or rush a complex one solely to reach an arbitrary duration.
How do I avoid a generic AI look?
Create a written brand system, reuse deliberate visual components, edit AI outputs and make topic-specific visual choices rather than accepting the first generated design.
What should remain human-reviewed?
At minimum, review facts, script meaning, rights, realistic AI disclosures, the final render and the decision to publish.
For current rules, review YouTube’s official guidance on AI-generated or altered content disclosures and YouTube channel monetization policies. Policies can change, so verify them again before scaling an automated channel.
Build a Faceless Shorts Content Engine Without Losing Quality
Once the first videos work, however, the next challenge is consistency. A content engine is not a button that generates unlimited uploads. It is a documented sequence that helps you move from idea to published Short without forgetting research, approvals or quality checks.
Create clear production statuses
Give every idea a status such as backlog, research, script, approved, storyboard, rendering, review, scheduled or published. Claude can then help organize work without confusing an unfinished concept with an approved video.
Limit work in progress
Finishing five strong videos is more useful than having fifty half-built projects. Set a limit on how many Shorts can be in production simultaneously.
Maintain a lessons file
After each batch, record what failed and what improved performance. Turn recurring lessons into explicit production rules so the system becomes more reliable over time.
Create a Research Template for Every Faceless Short
For this reason, a standardized research note helps prevent unsupported claims from slipping into fast production. Keep it short enough that you will actually use it.
Core question
Write the exact question the Short answers. This keeps research focused and prevents the script from drifting into unrelated facts.
Approved claims
List each important factual statement and the source that supports it. For numbers, include the relevant date or measurement context.
Claims to avoid
Record tempting statements that you could not verify. This prevents them from reappearing when the script is rewritten later.
Visual evidence
Note which facts can be shown as a chart, screenshot, diagram or quotation. Evidence that can be visualized often creates a stronger Short.
Extra Care for Finance, Health and Other Sensitive Topics
By contrast, short-form video can compress nuance too aggressively. If you publish finance, health or other high-impact information, prioritize accuracy over dramatic certainty.
Avoid guarantees
Do not turn a probability, historical result or personal experience into a guaranteed outcome. Keep qualifications that materially affect the viewer’s understanding.
Use current sources
Rules, prices, medical guidance and financial conditions can change. Check dates and avoid recycling an old script simply because the animation still looks good.
Make synthetic realism especially clear
YouTube notes that realistic altered or generated content around sensitive subjects can receive prominent disclosure treatment. If your visual could be mistaken for a real event, person or place, review the current disclosure requirements carefully.
Build an Image-Based Faceless Shorts Workflow
For instance, not every channel needs generated video. Still images can produce compelling vertical stories when the composition, crop and motion are designed intentionally.
Plan images from the storyboard
Generate or source images only after you know their purpose. This prevents an asset folder full of attractive pictures that do not support the script.
Design for vertical cropping
An image created for a landscape article may lose its subject when cropped to 9:16. Choose or create images with enough space around the focal point.
Use motion sparingly
Slow pushes, pans, masks and layered depth can create movement without turning every frame into a visual effect demonstration.
Track source and rights
For third-party photographs and illustrations, store licensing or permission information with the asset. For generated images, keep enough project context to know how they were created.
Create Better Faceless Shorts From Screen Recordings
Similarly, software tutorials are naturally suited to faceless video, but desktop interfaces are difficult to read on a phone. The solution is not simply to shrink the entire screen.
Record at a clean resolution
Use a consistent capture size and remove unrelated desktop clutter. Increase application text size when necessary.
Crop around the current action
Show the button, field or result being discussed. A programmed browser frame can animate between regions while keeping context.
Slow down important interactions
A click that takes half a second on desktop may need several seconds of explanation in a tutorial. Let the viewer see the state before and after the action.
Protect private information
Review screen recordings for email addresses, account names, API keys, personal files and notifications before publishing.
Create Data-Driven Faceless Shorts With Charts and Numbers
Furthermore, programmatic video is particularly strong for data storytelling because the same chart components can be fed new verified data.
Show units and context
A number without a unit, time period or comparison can mislead. Include enough context for the viewer to understand what is being measured.
Do not exaggerate chart scales
Animation can make small differences look dramatic. Use appropriate scales and labels rather than manipulating the chart for a stronger visual reaction.
Keep source notes with the dataset
Store the origin, access date and any transformation applied to the data. This makes future corrections possible.
Animate the explanation
Reveal the relevant series or number when the narration discusses it. Do not present an entire dense chart and expect the viewer to find the point.
Create Faceless Storytelling Shorts
On the other hand, story channels need more than a sequence of generated images. The viewer should understand who or what the story is about, what changes and why the ending matters.
Establish the situation quickly
Introduce only the details necessary to understand the conflict or mystery. Short-form stories cannot carry a large cast and extensive backstory comfortably.
Maintain visual continuity
If a recurring character or object appears, use reference assets and consistent design notes. Unexplained changes in clothing, color or location can make generated stories difficult to follow.
Use narration to bridge visual limitations
You do not need to generate every literal action. Narration can carry transitions while visuals emphasize the moments that matter most.
Build Templates That Stay Flexible
Ideally, a good template removes repetitive setup without dictating the entire creative result. It should provide safe areas, typography, standard transitions and reusable components while allowing different story structures.
Template the frame, not the idea
Keep brand and technical settings reusable, but let the topic determine the visuals. A science explanation should not be forced into the exact same scene sequence as a business tip.
Use optional components
Design components that can be included only when needed. A comparison table should not appear in every Short simply because it exists.
Version your template
When you improve captions or safe zones, update the template deliberately and test the change before applying it to a large batch.
Render Efficiently and Avoid Wasting Compute
Finally, rendering is one of the more expensive stages in a programmatic workflow, especially when visuals include many high-resolution assets.
Preview individual scenes
Test difficult components or short ranges before rendering the full video. Catching a text overflow in a five-second preview is much cheaper than finding it after the final export.
Use lower-resolution development renders
During iteration, a smaller preview can be enough to judge timing and layout. Render the approved version at your delivery settings.
Cache stable assets
If narration, images or other generated assets have already been approved, reuse them instead of regenerating them because one caption changed.
Add Safety Gates to Your YouTube Shorts Automation
As automation grows, the more tasks Claude can execute, the more important approval gates become. A safe system should distinguish between preparing a video and making it public.
Require factual approval
Do not render an authoritative educational Short until important claims have been reviewed.
Approve expensive generation
Approve the storyboard before generating large batches of voice, images or video clips.
Protect the publishing step
Keep public upload or visibility changes behind an explicit human action. A failed or placeholder render should never become public automatically.
Log what the pipeline produced
Store filenames, timestamps and major settings. Logs help diagnose mistakes and make the process auditable.
Repurpose a Short Without Creating Duplicate-Looking Content
Additionally, a strong idea can support several formats, but simple duplication is rarely the best use of it. Adapt the presentation to the platform and audience.
Turn the Short into a longer explanation
Use the short version as the hook and outline for a deeper YouTube video or article. Add examples and evidence rather than simply repeating the same script.
Create a follow-up instead of a clone
If viewers ask the same question in comments, make the next Short answer that question. This creates a connected series while keeping each upload useful.
Reuse components, not finished videos
The scalable asset is your production system: captions, charts, browser frames and brand rules. Those can appear across many original videos.
Scale Faceless Shorts With a Small Team
In addition, a code-based workflow can make handoffs easier because the project contains structured files rather than only an editor timeline.
Assign clear ownership
One person may research and verify claims, another may approve scripts, and another may review the final render. Define who can move a project to the next status.
Use written review notes
Explain why a change is requested. “Shorten this because the payoff arrives too late” is more reusable than “I don’t like it.”
Keep brand rules centralized
Team members and Claude should reference the same brand guide so visual consistency does not depend on one person’s memory.
Calculate the Real Cost of a Faceless YouTube Short
Of course, the cost is more than an AI subscription. Track narration, generated images or video, music licenses, storage, rendering and human review time.
Measure cost per published video
Divide monthly tool expenses by the number of useful videos produced, not the number of drafts generated. Failed experiments are part of the production cost.
Prefer reusable assets
A good chart component may cost time once and serve dozens of videos. Reusable infrastructure can be more valuable than repeatedly buying new generated assets.
Do not optimize away human review
Saving a few minutes is not worthwhile if an incorrect claim or licensing problem reaches the public channel.
Help Viewers Discover Your Faceless YouTube Shorts
Even so, search optimization can help some Shorts, but the content still needs to satisfy the viewer who chooses it. Use clear language around the actual topic rather than stuffing metadata with unrelated keywords.
Use descriptive titles
A title should identify the subject and create an accurate reason to watch. Avoid hiding the topic behind vague hype.
Write useful descriptions
Include relevant context, sources or resources when they benefit the viewer. If the Short uses affiliate links, disclose that relationship appropriately.
Connect related videos
Create series around recurring questions and point viewers toward a useful next video when the platform format allows it.
Maintain the System as Tools and Policies Change
Over time, Claude Code, Remotion, voice providers and YouTube itself will continue changing. Treat the workflow as maintained software rather than a one-time setup.
Pin stable dependencies
When the project works, record important package versions. Update intentionally and test before applying changes to active productions.
Review platform policies periodically
Do not rely forever on an old blog post or screenshot for monetization and AI disclosure rules. Check official YouTube guidance when your workflow begins using a new kind of synthetic content.
Retire weak components
If a visual style repeatedly hurts readability or feels dated, remove it from the approved component library instead of continuing to use it because it is automated.
Master Faceless YouTube Shorts Production Checklist
Before scripting
- First, confirm the idea fits a channel pillar.
- Identify the audience question.
- Gather reliable research.
- Record source notes for important claims.
Before rendering
- Approve the hook and payoff.
- Verify narration length.
- Approve the storyboard.
- Next, confirm asset rights.
- First, review realistic AI content for disclosure requirements.
Before publishing
- Watch the entire final Short.
- First, check captions on a phone-sized preview.
- Verify facts, names and numbers.
- Next, check music and effects levels.
- Remove placeholders and debug text.
- Finally, confirm title and description are accurate.
- Apply required disclosures.
After publishing
- Record the publication URL and date.
- Next, review analytics after enough data accumulates.
- Document lessons for the next Short.
- Archive the approved project assets.
Frequently asked questions
Do I need programming experience?
Programming knowledge helps with troubleshooting, but beginners can ask Claude Code to explain proposed changes before applying them. Basic familiarity with files and terminal commands is useful.
Can Claude Code create an entire YouTube Short?
It can help build and modify the code, scripts, project structure and automation. Other tools may still handle narration, generated images, generated video or final media encoding.
Do I need a camera?
No. A code-first workflow can use animated typography, diagrams, charts, licensed assets, illustrations or generated media.
Can I use the same videos for Reels or TikTok?
A vertical 9:16 master can often be adapted to other short-form platforms, but check each platform’s current publishing requirements and safe areas.
Does AI automatically make a channel monetizable?
No. AI tools do not guarantee monetization. Your finished content still needs to follow YouTube’s current policies and provide meaningful original value.
Build the system, not just one Short
The real advantage appears when every finished Short improves the workflow used to make the next one. Reuse the components that work, keep your brand rules stable, verify the content and maintain human approval before publishing.
Get Started With Claude Code →Three Complete Faceless Shorts Production Scenarios
Scenario 1: Educational fact Short
Suppose the channel explains science in under a minute. Start with one question that can be answered visually. Research the mechanism from reliable sources, write a concise hook and create a storyboard using a diagram, two labels and one animated comparison. Generate narration after approval, synchronize captions, and let the final scene answer the exact opening question. This format benefits from reusable diagram and number components, while the scientific explanation remains unique to each video.
Scenario 2: Software tutorial Short
For a software tip, record the actual interface first. Build the script around the real steps instead of inventing a workflow and trying to record it afterward. Crop the screen recording to the active area, add a clear cursor or highlight, and use narration to explain why the step matters. Verify that the interface and feature are still current immediately before publishing.
Scenario 3: Data comparison Short
For a ranking or comparison, begin with the dataset and definitions. Decide what the values actually measure, then create a chart component that displays labels, units and source context. Animate the comparison in the same order as the narration. Avoid dramatic visual scales that exaggerate small differences. The finished Short should remain understandable even if the viewer pauses on any major data frame.
Audit Your Faceless Channel Every 20 to 30 Shorts
A workflow can become efficient while the channel becomes repetitive. Periodic audits help you notice that problem before it becomes the channel’s identity.
Review topic diversity
Count how many recent videos came from each content pillar. If one format dominates because it is easiest to automate, decide whether that still serves the audience.
Review visual repetition
Look at a grid of recent Shorts with the sound off. If every video has the same first frame, same animation sequence and same payoff layout, introduce controlled variation.
Review factual corrections
Track mistakes or updates discovered after publishing. If the same type of error recurs, improve the research checklist rather than correcting each incident independently.
Review production efficiency
Measure time spent on research, script approval, assets, rendering and QA. Automate the repetitive stage that consumes time without requiring creative judgment.
Final Principles for Building Faceless YouTube Shorts With Claude Code
The strongest faceless workflow combines automation with clear authorship. Claude Code can coordinate files and code, Remotion can make repeatable visuals, and AI narration can remove the need for a microphone. None of those tools decides whether the idea deserves to exist.
Start with useful topics. Research claims before scripting. Build a hook that the video genuinely pays off. Use reusable components to make production faster, but keep the explanation and examples specific to the subject. Review realistic synthetic material against YouTube’s current disclosure requirements, and remember that monetization policies emphasize original and authentic content rather than sheer upload volume.
Most importantly, improve the system from real published work. Every Short should teach you something about your audience or your production process. When a component works, reuse it. However, change a format once it becomes repetitive. If a fact cannot be verified, remove it. Finally, simplify the workflow whenever automation creates more complexity than it saves. That discipline is what turns a faceless YouTube Shorts experiment into a sustainable publishing system.




Pingback: 25 Best Work From Home Jobs in 2026 (Remote Careers)