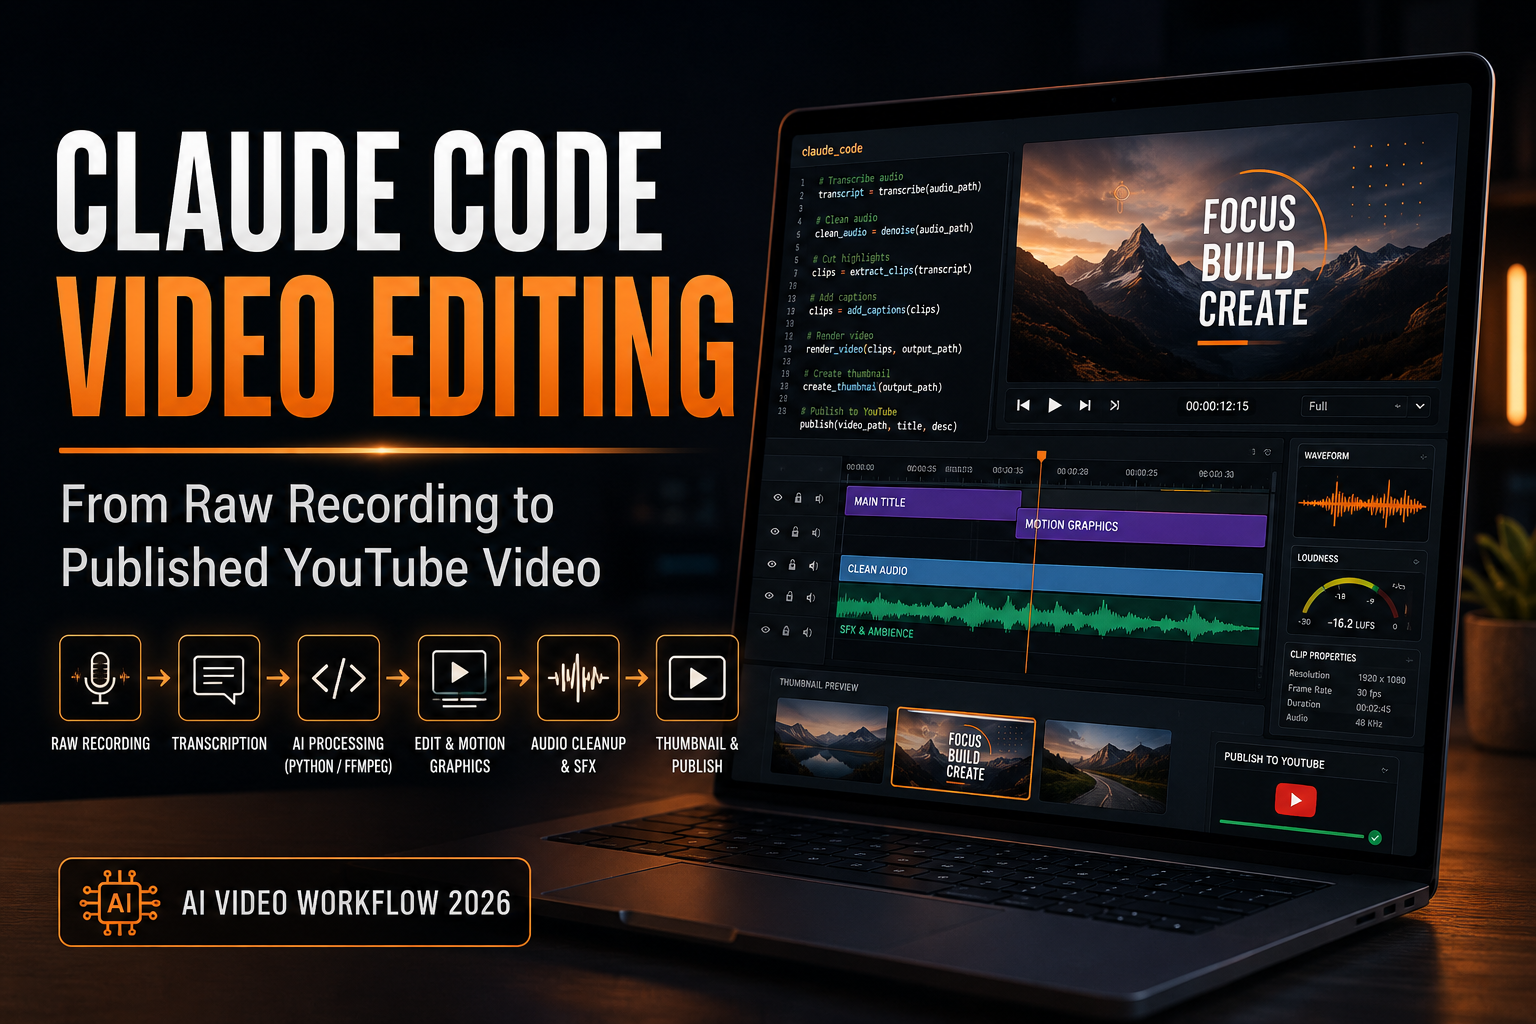
Learn how to build a repeatable Claude Code video editing workflow for talking-head YouTube videos using transcription, FFmpeg, Remotion, automated visuals, audio cleanup, sound design, thumbnails and final quality control.
This page focuses on the complete Claude Code video editing production workflow. If you need the step-by-step setup first, read How to Edit Videos With Claude Code: Beginner Setup & Workflow.
How Claude Code video editing works
The useful way to think about Claude Code video editing is as a production system. You record the parts that require you—your voice, performance and physical footage. Claude Code can then help coordinate the repeatable technical stages around that recording.
Talking-head footage, narration and real-world shots.
Instructions, scripts, files, timing data and production stages.
Transcription, cuts, audio cleanup, graphics and rendering.
Creative decisions, final quality, title, thumbnail and upload.
The key is the handoff between stages. A timestamped transcript can guide cuts. The edited timestamps can guide motion graphics. Those same timestamps can tell a sound-design script exactly where an effect should land.
What you need before getting started
| Tool | Purpose |
|---|---|
| Claude Code | Coordinates project instructions, scripts and repeatable tasks. |
| Python | Runs transcription and media-processing utilities. |
| Node.js | Runs the Remotion development environment. |
| FFmpeg | Reads, cuts, processes and exports audio/video. |
| Remotion | Creates programmatic video and motion graphics with React. |
| Git | Downloads and manages the project repository. |
Set up the Claude YouTube Editor project
A code-based workflow becomes easier to understand when you preview the project before processing a long recording. Start with a short test clip and verify each stage before scaling up.
git clone https://github.com/hassancs91/claude-youtube-editor
cd claude-youtube-editor
python -m venv venv

# macOS / Linux
source venv/bin/activate
python -m pip install -r requirements.txt

cd remotion
npm install
npm run gen
npm run studio
Remotion Studio lets you preview compositions in the browser. Because the graphics are code, text, timing, layout and animation can be revised without re-recording a screen demonstration.
1. Cut the raw recording with transcript context
The first stage converts raw footage into a usable master cut. Long pauses, false starts, repeated sentences and obvious mistakes can be identified from transcription data instead of relying only on silence detection.
Create a word-level timeline
Word-level timestamps are especially valuable because later stages can reuse them. A graphic can appear on the exact phrase it explains, while a sound cue can land on the exact word it emphasizes.
[
  {"word":"Claude","start":18.41,"end":18.79},
  {"word":"can","start":18.81,"end":18.96},
  {"word":"edit","start":19.01,"end":19.31}
]
Review the master cut before continuing. If the timing is wrong here, later graphics and sound cues can inherit the same mistake.
2. Build visuals instead of recording everything manually
Remotion can turn React components into video scenes. Claude Code can help generate or modify kinetic text, diagrams, code windows, browser frames, comparison cards and other repeatable visual elements.
Display key phrases at precise dialogue timestamps.
Turn explanations into animated processes.
Animate screenshots, cursors, scrolling and browser states.
Show commands and source code without filming a terminal.
Generate a browser walkthrough from screenshots
For some tutorials, static screenshots can become a dynamic walkthrough. A Remotion scene can animate cursor movement, clicks, zooms, scrolling and transitions between interface states. This makes later revisions easier than re-recording an entire browser session.
3. Clean and isolate the voice
Audio quality strongly affects how professional a video feels. Hiss, hum, room reflections, fans and traffic should be diagnosed before applying aggressive processing.
Local tools such as RNNoise can be useful for some noise-reduction tasks. More difficult recordings may benefit from cloud voice and audio tools.
Affiliate disclosure: the ElevenLabs link above is an affiliate link. I may earn a commission if you purchase through it, at no additional cost to you.
4. Add music and sound effects at meaningful moments
Sound effects work best when their timing supports what is happening on screen. Instead of scattering effects randomly, build a cue sheet from the same timeline used by the visual system.
{
  "cues": [
    {"time":32.71,"sound":"soft-impact.wav","reason":"third card appears","gain":-7},
    {"time":48.26,"sound":"whoosh-short.wav","reason":"scene transition","gain":-10}
  ]
}
Build a reusable sound library
Store useful assets with filenames, categories, duration, keywords, loudness information and source notes. Reusing good assets reduces unnecessary generation and helps maintain a consistent channel sound.
Keep a human review checkpoint before the final mix. Automation should prepare creative decisions, not remove your ability to approve them.
5. Turn the finished video into a clickable package
A polished edit still needs a title and thumbnail that accurately communicate the video’s value. Because the workflow already has the transcript, it can extract the main promise, target viewer, primary keyword and strongest proof point.
Show the result the viewer can achieve.
Show the old workflow versus the automated workflow.
Create a visual question that the video resolves.
Show a real interface, output or result.
6. Verify before uploading
Before publishing, inspect the final render for cut errors, broken graphics, spelling mistakes, audio peaks, missing assets and timing problems. Also verify that the title and thumbnail accurately represent the finished video.
Human quality control remains important. Claude Code can coordinate a checklist and automate technical tests, but the final creative decision should still be reviewed by you.
Customize the workflow for your brand
Reusable video production becomes more valuable when branding is configuration rather than a design decision repeated for every video. Centralize colors, typography, logo treatment, transition speed and motion intensity so new scenes can inherit the same visual language.
export const brand = {
  colors: { primary:"#6254E7", background:"#101118", text:"#FFFFFF" },
  typography: { heading:"Inter", body:"Inter" },
  motion: { energy:"medium", transitionFrames:12 }
};
The long-term advantage is compounding reuse. A browser component, title animation, comparison scene or sound effect created for one video can become an asset for the next.
What does Claude Code video editing cost?
The open-source project can be explored without purchasing a traditional video-editing subscription, but connected AI services may have their own plans or usage fees.
| Service | Role | Cost model |
|---|---|---|
| Claude Code | Workflow coordination and coding tasks | Depends on current Anthropic access/usage |
| AssemblyAI | Timestamped transcription | Usage based |
| ElevenLabs | Optional voice/audio processing | Plan or usage based |
| Google Gemini | Optional image/thumbnail workflows | Depends on model/API usage |
| YouTube | Hosting and publishing | Free |
Pricing changes, so check each provider directly before estimating production costs.
Get the Claude YouTube Editor project
Explore the source code, Claude Code skills, Python utilities, Remotion components and example workflow.
Open the GitHub Repository → Explore Claude Code →The bigger lesson: break the workflow into clear stages
The strongest idea in this approach is decomposition. Instead of asking AI to solve one enormous, vague problem, separate production into narrow jobs with clear inputs and outputs:
This architecture is easier to debug and improve. Each successful output can also become a reusable asset for future videos.
Frequently asked questions
Can Claude Code really edit videos?
Claude Code can coordinate scripts and code-based tools that perform editing tasks. FFmpeg, Python utilities and Remotion perform the underlying media operations.
Do I need to know React?
React knowledge helps with advanced customization, but Claude can assist with TSX code. Learning the basic structure of a Remotion composition still makes troubleshooting easier.
Does this replace Premiere Pro or CapCut?
It can automate substantial repetitive work for structured tutorials, talking-head videos and software demonstrations. Complex cinematic projects may still benefit from a traditional nonlinear editor.
Can the workflow remove filler words?
Transcript-driven editing can identify filler words, false starts and repeated phrases. Review proposed cuts before final rendering because context matters.
Can I use this for Shorts?
Yes. Remotion compositions can use vertical dimensions such as 1080×1920, making the same architecture useful for YouTube Shorts and other vertical formats.
Record the part only you can create
Use automation for repetitive production work, save the components that perform well, and improve the system with each video. Keep your attention on the ideas, explanations and creative judgment your audience actually came to hear.
Get the Free GitHub Project →How to Design a Reliable Claude Code Video Editing Architecture
A scalable Claude Code video editing workflow works best when you treat every production stage as a separate system with a clear input and output. Instead of allowing one long prompt to modify raw footage, graphics, audio and metadata at the same time, create checkpoints. First, preserve the camera original. Next, create a transcript. Then build an edit decision list, render a clean master, add visuals, process sound and run final quality control.
This architecture matters because video files are expensive to regenerate. If a mistake appears late in the process, you should be able to return to the affected stage without rebuilding everything. Therefore, each stage should save both the media output and the structured data that explains how it was created.
Use immutable source files
Never let an automation overwrite your only copy of the original recording. Put source footage in a read-only or clearly protected directory. Generated files should go into separate working and output folders. As a result, a failed FFmpeg command, incorrect cut list or experimental Claude instruction cannot destroy the source.
Save decisions as data
Whenever possible, store edit decisions in JSON, CSV or another machine-readable format. A cut list can contain start time, end time, reason and confidence. A visual plan can contain scene ID, start time, duration, component name and text. Likewise, a sound plan can contain timestamp, asset, gain and purpose. This makes the workflow auditable and much easier to revise.
A Better Project Folder Structure for AI Video Editing
Folder organization becomes increasingly important once you produce several videos. A simple structure can separate source media, transcripts, edit plans, Remotion code, audio, renders and publishing assets.
videos/
  project-name/
    00-source/
    01-transcript/
    02-edit-plan/
    03-master-cut/
    04-visuals/
    05-audio/
    06-sfx-music/
    07-thumbnails/
    08-renders/
    09-publish/
    logs/
The numeric prefixes keep the production order visible. In addition, predictable paths make Claude Code instructions easier to reuse because the agent does not have to rediscover where every asset belongs.
Create a project manifest
For each production, consider maintaining a small manifest file containing the project name, target aspect ratio, frame rate, resolution, audio sample rate, brand preset, transcript location and final output path. Then scripts can read those settings rather than relying on values scattered across commands.
Transcript-Driven Editing: Go Beyond Silence Removal
Silence removal is useful, but it is only the simplest form of automated editing. A stronger system analyzes meaning. For example, a speaker may pause before an important sentence for emphasis. Removing that pause automatically could make the delivery feel rushed. Conversely, a false start may contain very little silence but still need to be removed.
Therefore, the transcript should be treated as editorial context. Claude can review repeated phrases, abandoned sentences, filler, topic changes and sections that do not support the video’s promise. However, the proposed edits should remain reversible until a human review confirms them.
Use confidence levels for proposed cuts
You can classify edit decisions as high, medium or low confidence. Obvious retakes may be high confidence. Removing a long explanation because it seems repetitive may be medium confidence. Cutting a pause that could be stylistic may be low confidence. This approach allows automation to move quickly without pretending every creative decision is equally certain.
Protect sentence boundaries
Word-level timestamps are powerful, but cuts should include enough padding to preserve natural consonants, breaths and room tone. Before finalizing a master, inspect the frames and audio around every cut. In particular, avoid clipping the first or last sound of a word.
Build a Reusable Remotion Visual System
The largest long-term benefit of programmatic video is component reuse. Rather than asking Claude to invent every graphic from scratch, build a library of approved components. A channel might have a title card, lower third, quote card, browser frame, code window, comparison table, numbered list, progress bar and callout component.
Once those pieces exist, a new video becomes a configuration problem. Claude can choose the component, supply text and timing, and render it using your existing design rules. Consequently, visual consistency improves while production time falls.
Separate content from presentation
A component should receive data rather than contain one video’s wording permanently. For example, a comparison card can accept a heading, two labels, bullet arrays and an accent option. The same component can then serve dozens of videos.
Design for safe text lengths
AI-generated text can be unpredictable in length. Components should include sensible limits, wrapping behavior and fallback font sizes. In addition, Claude should be instructed to shorten copy when it exceeds the visual budget instead of forcing a paragraph into a small title card.
Preview before rendering
Use Remotion Studio to inspect new components and difficult scenes. Rendering an entire long video just to discover that a heading overflows wastes time and compute. A preview-first workflow catches layout problems earlier.
When to Generate Browser Demonstrations and When to Screen Record
Simulated browser scenes are useful when the interaction is simple and predictable. They work well for showing a landing page, highlighting a button, demonstrating a short navigation sequence or explaining an interface concept. Because the states are controlled, you can change timing, cursor movement and zoom without recording the process again.
However, a real screen recording is usually better when the exact behavior of the software is the subject. If viewers need to see latency, drag-and-drop behavior, a complex menu or a live result, simulation may hide useful information. The goal is clarity, not automation for its own sake.
Keep demonstrations truthful
If you recreate an interface programmatically, do not present invented results as though they came from a live product. Label conceptual mockups when necessary. Moreover, update screenshots when the underlying interface changes so the tutorial does not become misleading.
A Professional Audio Workflow for Claude Code Video Editing
Audio processing should be staged just like video. Start with the original camera or microphone audio. Then analyze loudness, noise and clipping. Apply only the cleanup that is necessary, and preserve an unprocessed copy.
Noise reduction before loudness normalization
In most workflows, cleanup comes before final loudness management. Otherwise, boosting a noisy recording can make unwanted sound more obvious. After cleanup, measure the result and normalize it for the intended publishing platform.
Keep music and effects subordinate to speech
For educational and talking-head videos, intelligible dialogue is the priority. Music should support pacing without masking speech. Likewise, sound effects should emphasize meaningful events rather than appear on every animation. A sparse sound plan often feels more professional than constant effects.
Reuse approved audio assets
A tagged local library reduces cost and inconsistency. Store category, mood, duration, source and licensing information with each asset. Then Claude can search the library before requesting or generating something new.
Adapt the Same Workflow for YouTube Shorts and Vertical Video
The underlying architecture can also produce vertical content. Instead of 16:9, create a 9:16 Remotion composition such as 1080 by 1920. However, simply cropping a horizontal video is rarely enough. Vertical content needs larger text, tighter framing and a different visual rhythm.
Reframe the speaker deliberately
If the original recording is wide, define safe crop regions so the speaker remains visible. Automated face tracking can help, but review the result because rapid reframing can become distracting.
Use fewer words on screen
Mobile viewers have less visual space. Therefore, turn long lower thirds into short phrases and use captions that are easy to scan. Keep important text away from interface areas that social platforms may cover with buttons or descriptions.
Batch Production Without Turning Videos Into Generic Templates
Automation becomes valuable when several videos share the same production structure. You can batch transcription, draft edit plans and reuse visual components. Nevertheless, the final video should still reflect the specific subject and audience.
Avoid forcing every topic into identical pacing. A technical tutorial may need longer screen demonstrations, while an opinion video may depend more on the speaker. Use templates for repetitive production mechanics, not as a substitute for editorial judgment.
Queue independent jobs
Transcription for one project can run while another project’s graphics are being reviewed. Similarly, thumbnail concepts can be generated after the transcript is approved without waiting for the final render. Separating dependencies helps increase throughput without making the workflow fragile.
Quality Control Checklist Before You Publish
A successful render only proves that the software produced a file. It does not prove the video is correct. Before publishing, run both automated checks and a human viewing pass.
Technical checks
- Confirm resolution, frame rate, codec and aspect ratio.
- Verify that the audio stream exists and is synchronized.
- Check for clipping, unexpected silence and extreme loudness changes.
- Confirm every referenced visual asset rendered.
- Check that no temporary debug text or placeholder component appears.
- Verify the final duration against the expected timeline.
Editorial checks
- Watch every cut around sentence boundaries.
- Confirm graphics support what is being said at that moment.
- Remove sound effects that feel distracting.
- Check names, numbers, URLs and on-screen claims.
- Confirm title and thumbnail accurately represent the video.
Finally, upload privately or unlisted first when possible. Watch the platform-processed version on both desktop and mobile before publishing it widely.
How to Debug a Claude Code Video Editing Workflow
When something fails, debug the smallest stage possible. Do not rerun the entire pipeline immediately. First identify whether the failure came from the source file, transcript, script, dependency, API, Remotion component, FFmpeg command or final assembly.
Keep logs for every major command
Save command output and error messages in a project log directory. Include timestamps and the relevant input/output filenames. This gives Claude useful evidence when you ask it to diagnose a problem.
Validate intermediate files
After transcription, confirm the transcript exists and contains plausible timing. After a clean cut, inspect the master before building graphics. After audio processing, listen before mixing music. These checkpoints prevent one bad output from contaminating later stages.
Pin important dependencies
Automation can break when package versions change. Once the workflow is stable, record or lock important Python and Node dependencies. Update intentionally rather than allowing every production to use an unpredictable new environment.
API Keys, Security and Safe Automation
A production workflow may connect to several services. Keep API keys in environment variables or local configuration files excluded from version control. Never place secrets in prompts that will be published, screenshots, WordPress articles or public repositories.
Also limit automation permissions. A video editing project usually does not need access to unrelated personal folders. Give scripts access only to the directories and services required for the task.
Use a publishing approval gate
Even if your system can upload to YouTube automatically, separate rendering from public publishing. The safest default is to require explicit approval before changing a video’s visibility to public. That single checkpoint protects against many automation mistakes.
Control AI Video Editing Costs
The cheapest generation is the one you do not have to repeat. Therefore, optimize for fewer failed runs rather than simply choosing the lowest-cost model. Preview graphics at low resolution, test on short clips and approve edit plans before expensive processing.
Use local tools where they are good enough
FFmpeg, Python and many audio utilities can perform deterministic tasks locally. Reserve paid AI calls for jobs that actually benefit from language, vision or generative reasoning. This keeps the architecture flexible and reduces dependence on one provider.
Track cost by project
If you produce videos commercially, record transcription, AI, storage and rendering expenses per project. Over time, this reveals which automation stages save money and which ones create unnecessary retries.
Measure Whether the Workflow Is Actually Better
Automation should improve a measurable outcome. Track production hours, number of manual interventions, failed renders, revision rounds and direct service cost. Then compare those numbers with your previous editing process.
Publishing metrics matter too, but separate production efficiency from content performance. A faster editing system cannot rescue an uninteresting topic or weak title. Conversely, a strong video may perform well even if the production process was inefficient.
Build a post-production retrospective
After each project, record what failed, which components were reused, what required manual repair and what should become a new reusable rule. This is how a Claude Code video editing workflow compounds in value over time.
Complete Claude Code Video Editing Workflow: Start to Finish
Here is a practical production order that keeps each stage reviewable.
- Record: capture the footage and copy it into the protected source folder.
- Transcribe: generate timestamped text and verify obvious transcription errors.
- Plan cuts: produce a reversible edit decision list with reasons.
- Review: approve uncertain editorial changes before rendering.
- Create the master: use the approved cut list to generate the clean dialogue edit.
- Map visual beats: identify where diagrams, text, browser scenes or code demonstrations add value.
- Generate visuals: use reusable Remotion components and preview difficult scenes.
- Process voice: clean noise and prepare consistent dialogue audio.
- Plan sound: select music and sparse effects using transcript timestamps.
- Assemble: combine approved video, graphics and audio.
- Package: create accurate title and thumbnail directions from the finished content.
- Run QA: check technical properties and watch the complete render.
- Upload privately: verify the platform-processed version.
- Publish: release only after final approval.
This sequence is intentionally modular. If the thumbnail changes, you do not need to regenerate the video. If one graphic is wrong, you can fix the component and rerender the affected portion. In other words, the system becomes maintainable rather than merely automated.
Build a Video Planning System Before Claude Code Touches the Timeline
The most efficient Claude Code video editing workflows begin before the first cut. A clear planning layer gives the automation context about the video’s promise, audience, format and required evidence. Without that layer, an agent may make technically correct edits that weaken the story.
Start with a short production brief. Define the working title, target viewer, main outcome, approximate duration, platform and the single idea the viewer should remember. Then add any non-negotiable demonstrations, quotations, product shots, disclosures or calls to action. This brief becomes a reference document for later decisions.
Convert the brief into editorial rules
Editorial rules should be concrete enough to guide decisions. For example, you might require the first practical demonstration within two minutes, prohibit removing warnings or qualifications, preserve every step in a tutorial, and avoid more than two consecutive talking-head sections without a supporting visual.
These rules help Claude distinguish between a sentence that is merely verbose and one that carries essential context. Moreover, they reduce the chance that an aggressive pacing pass removes information the audience needs.
Define the desired pacing by section
Pacing does not have to be uniform. An introduction can move quickly, while a command-line demonstration may need extra time for viewers to read. A comparison section may benefit from pauses around key numbers. Therefore, assign a rough pacing style to each chapter instead of telling the system to make the entire video “fast.”
Create a must-keep list
Before editing, mark statements, clips and demonstrations that must survive every revision. This is especially useful for sponsored disclosures, safety information, legal qualifications, exact commands and conclusions supported by evidence. The must-keep list acts as a guardrail during automated shortening.
How to Clean and Structure the Transcript for Better AI Editing
A raw transcript is often noisy. It may contain incorrect names, missing punctuation, duplicated fragments and timestamps that are accurate enough for reading but not precise enough for frame-level editing. Cleaning the transcript before asking for editorial analysis produces better decisions.
Normalize names and technical terms
Create a small glossary for product names, people, software, acronyms and unusual terminology. Then correct those items in the transcript or provide the glossary alongside it. This prevents the model from misunderstanding an important term because the speech-to-text system spelled it incorrectly.
Separate spoken words from production notes
Do not mix narration, editor comments and system instructions without labels. Use fields such as speaker, text, start, end and note. If the speaker says “cut that,” the system should know whether those words belong in the video or are an instruction captured accidentally during recording.
Add chapter boundaries
Long transcripts are easier to reason about when divided into semantic chapters. You can ask Claude to propose chapter boundaries and then review them. Once approved, later prompts can work on one chapter at a time, which reduces context overload and makes revisions easier to trace.
Preserve the untouched transcript
Keep the raw transcript beside the cleaned version. That way, if a correction changes meaning or a timestamp shifts, you can compare the transformation. This simple habit is valuable when a project passes through multiple automated stages.
Create an Edit Decision List That Humans Can Review
An edit decision list, or EDL, is the bridge between language-model reasoning and deterministic media processing. Claude can suggest what should change, but a structured list tells the rendering tools exactly what to do.
A practical entry can contain an ID, source file, start time, end time, action, reason, confidence and reviewer status. For example, one item might say to remove a repeated sentence from 04:12.4 to 04:18.8 because the speaker restates the previous point. Another might mark a pause for review rather than deletion.
Separate removal from rearrangement
Cutting material and moving material are different editorial operations. Rearrangement can change meaning, chronology or cause-and-effect. Therefore, require stronger review for any operation that changes the original order of statements.
Track rejected suggestions
When you reject an AI edit, save the reason. Over several projects, those rejections reveal patterns. Perhaps the system removes pauses you prefer, trims disclaimers too aggressively or misunderstands your humor. Those patterns can become explicit rules in future prompts.
Generate a readable review report
Alongside the machine-readable EDL, generate an HTML or Markdown report with the original text, proposed change and rationale. A reviewer can approve or reject changes without reading raw JSON. After approval, convert only accepted decisions into rendering instructions.
Use FFmpeg as the Deterministic Media Engine
Claude Code is useful for planning and orchestration, but FFmpeg remains a powerful engine for deterministic media operations. It can trim, concatenate, transcode, scale, crop, normalize, extract audio, create proxies and inspect media properties.
Inspect media before editing
Before processing, use media metadata to confirm duration, resolution, frame rate, audio channels and codecs. If source files differ, normalize them intentionally rather than discovering incompatibilities during final assembly.
Create proxies for heavy footage
High-resolution footage can slow experimentation. For long 4K or high-bitrate recordings, generate lightweight proxies for transcript alignment and visual review. Keep timestamps compatible with the original source so approved decisions can later be applied to the full-quality media.
Avoid unnecessary re-encoding
Every re-encode takes time and may reduce quality. Design the pipeline so intermediate stages do not repeatedly compress the same footage. When possible, keep a high-quality master and perform the final delivery encode near the end.
Verify concatenation boundaries
Automated cuts can produce tiny audio discontinuities or visual jumps. Review joins, especially when the speaker moves between takes. A short room-tone bridge, J-cut, L-cut or supporting visual can make a technically correct edit feel much smoother.
Create Better Captions and On-Screen Text
Captions can improve accessibility and make videos easier to follow in environments where viewers cannot use sound. However, automatic captions still need editorial rules. Long subtitle blocks, poor line breaks and incorrect terminology can make a polished video feel unfinished.
Correct the transcript before caption rendering
The caption file should inherit corrections from your approved transcript. In particular, verify names, brands, technical commands and numbers. A visually perfect caption that contains the wrong command is still a serious tutorial error.
Use readable line lengths
Break captions at natural phrase boundaries. Avoid placing a single article or preposition on a new line when possible. Also keep captions clear of lower thirds and platform interface elements.
Distinguish captions from emphasis text
Full captions reproduce speech, while emphasis text highlights a key phrase. Do not stack both systems constantly. Instead, reserve large animated words for moments that genuinely deserve extra attention.
Export a standard caption file
In addition to burned-in captions, consider exporting a standard subtitle file such as SRT or VTT when the publishing platform supports it. This allows viewers to control captions and makes future corrections easier.
Plan B-Roll and Supporting Visuals From the Transcript
B-roll should explain, prove or refresh attention. It should not exist simply because a template says a visual must change every few seconds. Claude can identify places where the spoken content benefits from a demonstration, screenshot, chart, icon, code sample or contextual image.
Assign a purpose to every visual
Label each planned visual as demonstration, evidence, orientation, comparison, emphasis or pacing. If a visual has no clear purpose, reconsider whether it belongs. This keeps the video informative rather than visually noisy.
Prefer evidence over decoration
When the speaker references a measurable result, show the relevant result if you have permission to do so. When explaining a software step, show the interface. Decorative stock footage may look polished, but direct evidence often creates more viewer trust.
Maintain visual continuity
Use consistent browser frames, code styles, icon families and typography. If every generated scene has a different design language, the production can feel assembled from unrelated templates. A reusable component system solves much of this problem.
Use Motion Graphics Without Overediting the Video
Motion graphics can clarify complex information, but excessive movement competes with the speaker. Establish a hierarchy. Major chapter transitions may use stronger animation, while ordinary labels should enter and leave quietly.
Animate meaning, not everything
If a chart compares two values, animation can reveal the difference. If a process contains four steps, motion can guide the viewer through them in sequence. By contrast, making every word bounce rarely adds meaning.
Standardize animation timing
Create presets for entrances, exits and emphasis. Consistent timing gives the channel a recognizable rhythm and reduces the number of creative decisions Claude must make for every scene.
Respect reading time
On-screen text must remain visible long enough to read. Estimate reading time from the amount of text and preview the result at normal playback speed. Do not allow an animation to disappear simply because the narration moved on quickly.
Color Correction, Cropping and Visual Consistency
AI-assisted editing is not only about cuts and graphics. Source footage may need exposure, white-balance, crop or framing adjustments. These operations should be conservative unless the project intentionally uses a stylized look.
Normalize before stylizing
First correct obvious inconsistencies between clips. Then apply any creative look. This order makes it easier to keep multiple recording sessions visually coherent.
Use safe reframing rules
For automated crops, define minimum headroom and safe margins. Face detection can help, but it should not cause constant camera movement. When the speaker is already framed well, leaving the shot stable is often the better choice.
Check graphics against real footage
A lower third that looks excellent on a dark test background may disappear over a bright scene. Preview components over representative footage and use backgrounds, shadows or contrast treatments where needed.
Handling Multi-Camera and Multiple Audio Sources
A multi-camera project adds synchronization and selection decisions. Before editorial analysis, align cameras and audio to a common timeline. Once synchronized, the transcript can reference a unified time base.
Choose camera changes for a reason
Do not alternate angles mechanically every few seconds. A close shot can emphasize an important statement, while a wider shot may work better during a physical demonstration. Camera selection should support meaning and continuity.
Protect the best audio source
When several cameras record audio, choose the cleanest microphone as the primary source whenever possible. Camera audio can remain useful for synchronization or backup, but switching audio quality with every camera cut is distracting.
Use reaction and cutaway angles carefully
Secondary angles can hide jump cuts, but they should remain temporally truthful. Avoid using a reaction from a different moment if doing so changes the apparent sequence of events.
Optimize the Workflow for Long-Form YouTube Videos
Long-form projects create context and performance challenges. A ninety-minute transcript may be too large to analyze effectively in one prompt, and a full-resolution render can take substantial time. Divide the project into chapters while preserving a global outline.
Use hierarchical summaries
Summarize each chapter, then create a project-level summary from those chapter summaries. Claude can use the hierarchy to identify repetition across distant sections without loading every word into every task.
Render chapters during development
When practical, test difficult chapters independently. This allows you to approve graphics and audio treatment before committing to the final long render. Later, assemble approved chapters using consistent delivery settings.
Watch for cross-chapter repetition
Speakers often restate the introduction at the beginning of each recording segment. A global review can identify these repetitions while preserving useful recaps that help the viewer follow a complex tutorial.
Claude Code Video Editing for Interviews and Podcasts
Interview editing has different priorities from a scripted tutorial. Natural conversation, speaker intent and emotional timing matter more than relentless speed. The transcript can still help locate repeated answers, off-topic sections and strong quotations.
Preserve conversational context
A short answer may depend on the question immediately before it. If you remove the setup, the response can sound misleading. Therefore, review proposed deletions in context rather than as isolated transcript lines.
Identify clips for promotion
Once the main edit is approved, Claude can search the transcript for self-contained moments that may work as Shorts or social clips. Require each candidate to include enough context to remain accurate outside the full episode.
Create chapter markers
Topic boundaries in an interview can become YouTube chapters. Generate candidate chapter titles from the transcript, then rewrite them for clarity and accuracy before publishing.
Claude Code Video Editing for Software Tutorials
Software tutorials benefit from precise synchronization between narration and screen content. A viewer should see the relevant button, command or result when it is mentioned. This makes timeline metadata especially valuable.
Capture interface states intentionally
For each important step, preserve the relevant screenshot, screen recording or browser state. Name assets using the tutorial step or scene ID so Claude can map them to the transcript reliably.
Do not hide errors that teach something useful
A clean tutorial does not always mean pretending everything worked on the first attempt. If an error is common and the solution is valuable, keep a concise version of the problem and fix. This can make the tutorial more useful than an unrealistically perfect demonstration.
Verify commands independently
Before publishing, copy commands from the final on-screen graphics and test them. Do not assume that a generated code card matches the command that actually worked during recording.
Editing Review and Affiliate Videos Responsibly
Review videos often combine personal experience, product footage, pricing, specifications and affiliate calls to action. Automation can organize these elements, but factual claims should remain tied to reliable evidence.
Keep disclosures visible
If a video contains affiliate links or sponsorships, preserve the required disclosure in the spoken or written material according to the rules that apply to you. Do not allow an automated shortening pass to remove it because it seems unrelated to the product comparison.
Separate experience from specifications
A statement such as “I found this easier to use” is different from a measurable specification. During editing, maintain that distinction. Graphics should not transform subjective impressions into unsupported objective claims.
Update time-sensitive information
Prices, plans and product availability can change. If the video displays them, include the date or verify the information shortly before publishing. Avoid building permanent graphics around a temporary promotional price unless the timing is clear.
Build a Repeatable Thumbnail Production System
A thumbnail is a separate creative asset, but the finished video should inform it. After the final edit, extract the strongest visual concepts, outcomes and emotional moments. Then generate several thumbnail directions rather than one final design immediately.
Use the video’s real promise
The thumbnail should reinforce the title without promising a result the video does not deliver. Claude can compare candidate thumbnail copy with the transcript and flag concepts that are not supported by the finished content.
Design at small size
A thumbnail may look impressive at full resolution but fail in a mobile feed. Test candidates at small display sizes. Prioritize one focal subject, clear contrast and very limited text.
Keep source files editable
Store layered or component-based thumbnail sources when possible. If the title changes or a platform crops differently, you can revise the design without starting over.
Generate YouTube Metadata From the Final Video, Not the Draft
Titles, descriptions and chapters should reflect what survived the edit. If metadata is written from an early script, it may mention sections that were later removed. Therefore, generate the final packaging from the approved transcript or rendered-video outline.
Create chapters from actual timestamps
Chapter timestamps should come from the final timeline. Even small edits can shift later chapters. Recalculate them after the master render rather than copying timestamps from an early plan.
Write descriptions for humans first
A useful description explains what the viewer will learn, provides relevant resources and includes required disclosures. Avoid stuffing repetitive keywords simply because the metadata was generated automatically.
Keep a publishing manifest
Save the final title, description, tags if used, chapters, thumbnail path, caption path and upload status in the project folder. This creates a record of what was actually published.
Use Version Control for the Code Side of Video Production
Remotion components, Python scripts, configuration files and documentation benefit from version control. A Git repository lets you see when a component changed and restore a working version if a new experiment breaks the pipeline.
Do not commit secrets or huge media files blindly
Keep API credentials out of the repository. Likewise, large source videos usually belong in media storage rather than ordinary Git history. Use ignore rules to exclude generated renders, temporary files and local secrets.
Commit reusable improvements
When a project produces a better lower third, safer FFmpeg helper or improved caption component, promote that improvement into the reusable toolkit. This is how one finished video makes the next production easier.
Using Claude Code Video Editing in a Team
A team workflow needs explicit ownership. One person may approve editorial cuts, another may review graphics and another may control publishing. Automation should make those responsibilities clearer rather than silently bypassing them.
Define approval states
Use states such as draft, AI proposed, editor approved, rendered, QA approved and published. Store the status with each major artifact. This prevents an unreviewed file from being mistaken for the final version.
Leave useful review notes
Comments should explain the reason for a change. “Fix this” is less useful than “keep the pause because it separates two concepts.” Detailed feedback can improve both the current edit and future automation rules.
Standardize handoffs
A clear handoff includes the current manifest, latest render, unresolved issues and next required action. This reduces the amount of project history a teammate must reconstruct.
Backups, Archiving and Reopening Old Projects
A finished video may need updates months later. Preserve enough information to recreate or modify it. At minimum, archive source media, the approved transcript, edit decisions, project code, important generated assets, final audio, thumbnail source and publishing manifest.
Separate temporary files from archival files
Cache files, proxies and preview renders can often be regenerated. Mark them as temporary so they do not inflate backups unnecessarily. By contrast, custom graphics, licensed assets and approved edit data may be difficult to recreate and deserve durable storage.
Document external dependencies
If a project depends on a particular font, package, model or external service, record it. Otherwise, reopening the project later may produce a different result even when the source code is unchanged.
Choose the Right Level of Automation
Not every creator needs a fully autonomous pipeline. You can adopt Claude Code video editing gradually. The best level depends on production volume, technical comfort and how repeatable the content format is.
Level 1: AI-assisted planning
Use Claude to analyze transcripts, propose cuts and create visual plans, while performing all media edits manually. This gives you editorial assistance without changing your existing editing software.
Level 2: Scripted media operations
Add deterministic FFmpeg and Python scripts for repetitive tasks such as trimming, normalization, file naming and proxy generation. Human approval still controls every important edit.
Level 3: Reusable programmatic graphics
Introduce Remotion components and structured scene data. The system can now create consistent visuals from approved templates.
Level 4: Orchestrated production
Claude Code coordinates transcript analysis, scripts, assets and rendering across the project. Approval gates remain between high-impact stages.
Level 5: Selective publishing automation
Only after the earlier stages are reliable should you consider automating uploads or metadata entry. Even then, maintain a final human approval before public release.
Common Claude Code Video Editing Mistakes to Avoid
Trying to automate the entire workflow on day one
A huge pipeline is difficult to debug. Start with one repeatable pain point, such as transcript-based cut suggestions or standardized lower thirds. Once that stage is reliable, connect it to the next.
Letting AI make irreversible edits
Always preserve originals and store edit decisions separately. Reversibility is one of the most important design principles in an AI-assisted creative workflow.
Using generated visuals without verification
A generated screenshot, chart or code sample can be wrong. Verify any visual that communicates a factual claim or technical instruction.
Optimizing only for speed
Faster production is useful only when quality remains acceptable. Track revisions and viewer outcomes alongside production time.
Ignoring licensing
Music, stock footage, fonts, images and generated assets can have different usage terms. Keep source and licensing information with the asset rather than trying to reconstruct it after publication.
Publishing without watching the final render
No automated test can replace a complete viewing pass. Watch the finished video with headphones and, when practical, on more than one screen size.
A 90-Day Plan for Building Your Claude Code Video Editing System
Days 1–30: Make the workflow reproducible
Choose one video format you produce regularly. Standardize folders, file names, transcription and the basic master-cut process. Build a small glossary and create a repeatable project brief. During this phase, prioritize reliability over advanced automation.
At the end of the first month, you should be able to start a new project from the same template and know where every major output belongs.
Days 31–60: Add reusable visual and audio systems
Build several Remotion components that cover the visuals you use most often. Organize music and effects with tags. Add QA scripts for media properties and create a human-readable edit report. Measure how much time each stage requires.
Days 61–90: Connect the stages carefully
Once individual stages are stable, let Claude Code orchestrate them. Add approval gates, logging and recovery instructions. Test the pipeline on several real videos rather than one ideal example.
By day ninety, the goal is not a magical one-click editor. The goal is a documented production system that handles repetitive work consistently while leaving creative and factual decisions reviewable.
Advanced Claude Code Video Editing Questions
Can Claude Code replace Premiere Pro, Final Cut Pro or DaVinci Resolve?
It can replace or automate some operations, especially in repeatable workflows, but traditional nonlinear editors remain useful for visual timeline work, complex color grading and hands-on creative adjustments. Many creators will benefit from a hybrid workflow.
Does Claude Code itself render video?
Claude Code coordinates instructions and tools. Actual media processing is typically performed by software such as FFmpeg, Python libraries, Remotion or other applications available in the environment.
Is programmatic video editing only for programmers?
No, but basic comfort with files, commands and troubleshooting helps. A well-documented project can hide much of the complexity behind reusable scripts and clear instructions.
Can the workflow edit 4K footage?
Yes, if the underlying hardware and tools can process it. However, proxies can make analysis and experimentation faster. Apply approved decisions to the full-quality source for the final master.
Can it create videos automatically from a script?
A system can generate narration, visuals, compositions and renders from structured input, but fully automated generation still benefits from human review for accuracy, pacing, rights and visual quality.
Can I use the same system for Shorts?
Yes. Create separate vertical compositions and design rules rather than relying only on automatic cropping. Text size, framing and pacing should be adapted for the format.
How should I handle failed renders?
Save logs, identify the smallest failing stage and rerun only that stage. Stable intermediate outputs prevent a single failure from forcing a complete restart.
Should Claude have permission to publish directly?
For most workflows, keep public publishing behind an explicit approval gate. Automation can prepare the upload, but a final review protects against accidental or incomplete releases.
What should I automate first?
Start with the repetitive task that consumes the most time and has clear success criteria. Transcription, file organization, proxy creation, caption preparation and reusable graphics are common starting points.
How do I know whether the system is saving time?
Measure production hours, manual interventions, revision rounds and failed renders across several projects. Compare those numbers with your previous workflow rather than judging from one video.




Pingback: Inside My AI Content Factory: How I Build Evidence-Driven Content
Pingback: How to Edit a YouTube Video With Claude Code: Step-by-Step