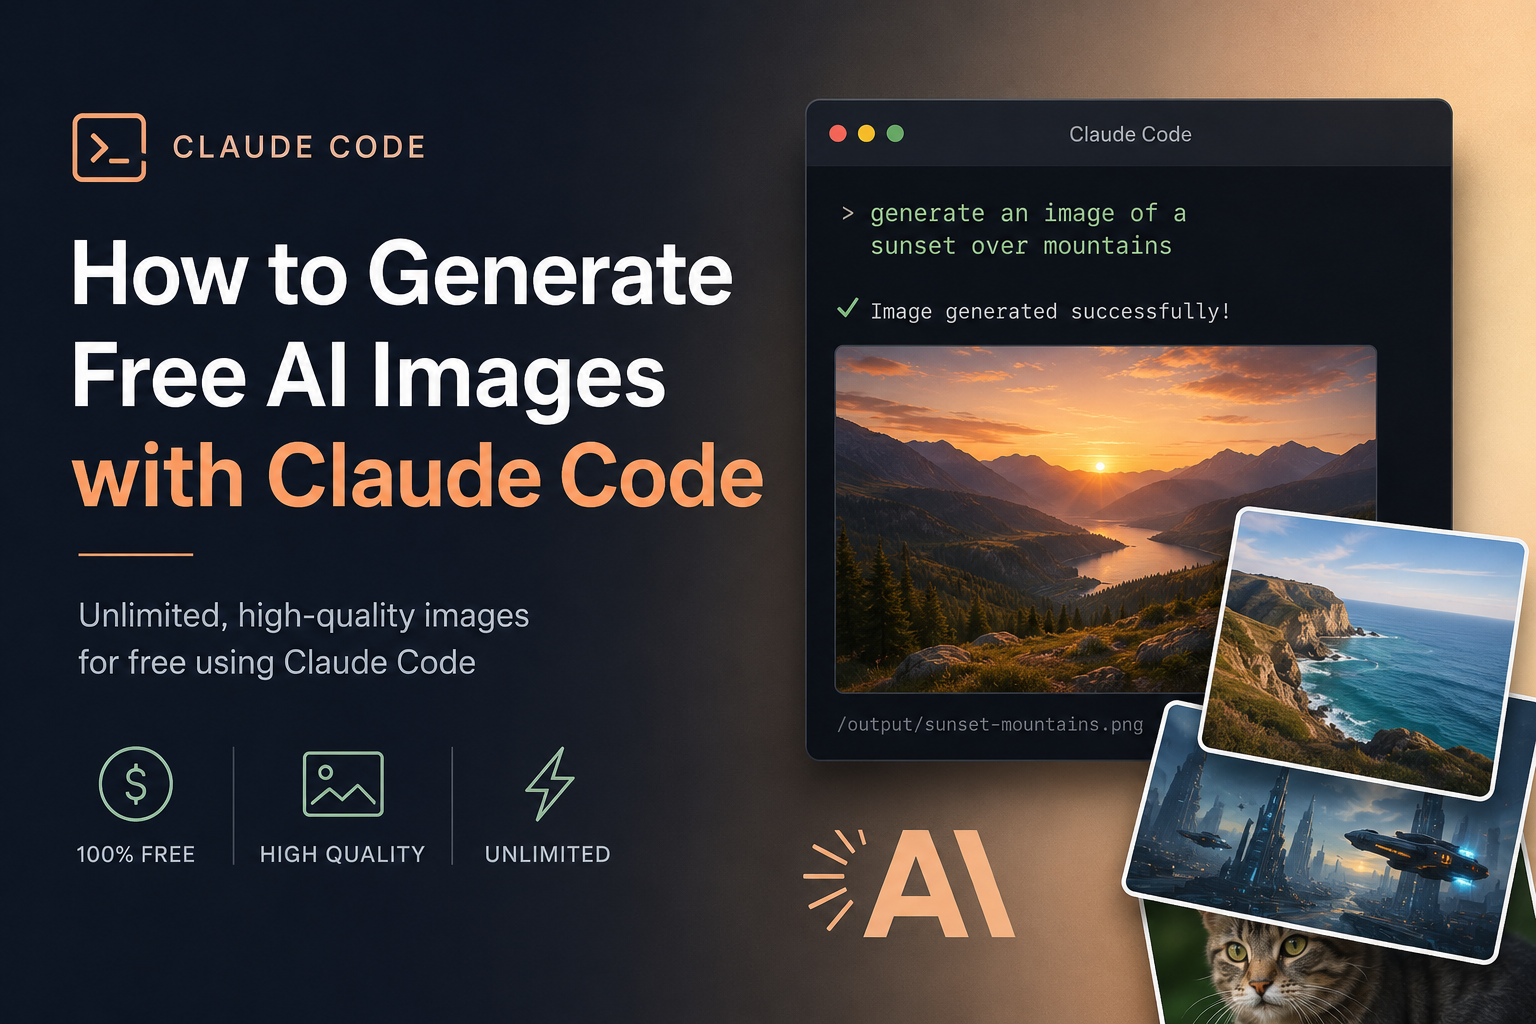
How to Generate Free AI Images With Claude Code + Cloudflare Workers AI
Learn how to create AI-generated images directly from Claude Code using Cloudflare Workers AI and FLUX.1 schnell. This workflow gives you a powerful way to generate blog graphics, featured images, social media visuals, product concepts, and creative images without paying for a traditional AI image subscription.
TL;DR
You can combine Claude Code with Cloudflare Workers AI to create a simple AI image generator directly inside your coding workflow. Claude Code improves your image prompt, a Python script sends the request to Cloudflare’s FLUX.1 schnell model, and the generated JPG is automatically saved inside your project folder.
- Create a Cloudflare Workers AI account.
- Generate a secure Workers AI API token.
- Connect Cloudflare image generation with Claude Code.
- Create a reusable Claude Code image generation skill.
- Generate AI images from simple natural-language commands.
- Understand Cloudflare’s current free Workers AI allowance.
- Write better prompts for FLUX.1 schnell.
- Turn the workflow into a powerful AI content creation tool.
AI image generators have become extremely popular among bloggers, marketers, developers, YouTubers, designers, affiliate marketers, and online business owners.
The problem is that many popular AI image platforms operate through monthly subscriptions or limited credit systems.
If you regularly create blog posts, landing pages, YouTube thumbnails, social media graphics, or marketing campaigns, those costs can quickly become expensive.
Fortunately, there is another approach.
Instead of using a traditional browser-based image generator, you can connect Claude Code directly to Cloudflare Workers AI.
This allows you to generate images directly from your development environment.
You simply describe the image you want.
Claude Code can improve your prompt, send it to the Cloudflare API, and automatically save the resulting image to your computer.
How This AI Image Workflow Works
Before building anything, it helps to understand the basic architecture.
There are four main components involved.
Claude Code
Claude Code understands your request, improves your prompt, executes the image generation script, and helps you iterate on the result.
Cloudflare Workers AI
Cloudflare runs the AI model on its infrastructure, meaning you do not need to own an expensive GPU.
FLUX.1 Schnell
FLUX.1 schnell is a fast text-to-image model from Black Forest Labs available through Cloudflare Workers AI.
The user experience can become extremely simple.
You might type something like:
Create a futuristic featured image for an article about AI automation.
Claude Code can transform that basic idea into a more detailed image prompt.
It then sends the prompt to the image generation script.
The Python script sends the request to Cloudflare.
Cloudflare generates the image.
The image is downloaded automatically and stored inside your project.
One Prompt. One Generated Image.
Claude Code becomes the interface while Cloudflare Workers AI performs the actual image generation.
Why Use Cloudflare Workers AI?
There are many AI image APIs available today, but Cloudflare Workers AI has several advantages for developers and content creators.
1. No GPU Required
Running modern image generation models locally often requires powerful graphics cards.
Cloudflare handles that infrastructure for you.
2. Free Daily AI Allowance
Cloudflare currently includes 10,000 Workers AI Neurons per day at no charge.
For individuals experimenting with AI workflows, this can provide a surprisingly large amount of free usage.
3. Simple REST API
You can access Workers AI using ordinary HTTP requests.
That means Python, JavaScript, PHP, Node.js, or practically any language capable of sending HTTP requests can interact with the service.
4. Multiple AI Models
Workers AI is not limited to image generation.
Cloudflare also provides models for tasks such as:
- Text generation
- Embeddings
- Speech recognition
- Translation
- Computer vision
- Image generation
- Text classification
Once you learn how to connect Claude Code to one model, the same basic architecture can be adapted to many other AI workflows.
What You Need Before Starting
You only need a few things to follow this tutorial.
- A Cloudflare account
- Claude Code installed
- Python installed
- A text editor or coding environment
- Internet access
You do not need to purchase an expensive GPU.
You also do not need to deploy your own image-generation server.
Step 1: Create Your Cloudflare Credentials
The first step is creating the credentials that allow your Python application to communicate with Cloudflare Workers AI.
Create a Cloudflare Account
Visit the Cloudflare dashboard and create a free account if you do not already have one.
Open Workers AI
Inside the Cloudflare dashboard, navigate to the Workers AI section.
Locate Your Account ID
Cloudflare assigns every account a unique Account ID.
You will need this ID when constructing your Workers AI API endpoint.
Create an API Token
Generate an API token that has permission to access Workers AI.
Step 2: Create Your Project
Create a new folder on your computer.
For example:
cloudflare-ai-images
Your final project structure could look like this:
cloudflare-ai-images/

├── .claude/
│   └── skills/
│       └── cloudflare-image/
│           ├── SKILL.md
│           └── generate.py
│
├── generated-images/
│
├── .env
│
└── .gitignore
Create Your Environment File
Inside the project folder, create:
.env
Add your Cloudflare credentials:
CF_ACCOUNT_ID=YOUR_CLOUDFLARE_ACCOUNT_ID

CF_API_TOKEN=YOUR_CLOUDFLARE_API_TOKEN
Replace the placeholder values with your real Cloudflare information.
Protect Your API Key
Create another file:
.gitignore
Add:
.env
This prevents your private Cloudflare credentials from accidentally being uploaded to GitHub.
Step 3: Create the Python AI Image Generator
Now we can create the actual image generation script.
First install the required Python packages.
pip install requests python-dotenv
We will use:
- requests to communicate with Cloudflare
- python-dotenv to securely load API credentials
Create generate.py
Create the following file:
.claude/skills/cloudflare-image/generate.py
Add this code:
import os
import base64
import argparse
import requests

from dotenv import load_dotenv


load_dotenv()


ACCOUNT_ID = os.getenv("CF_ACCOUNT_ID")
API_TOKEN = os.getenv("CF_API_TOKEN")


MODEL = "@cf/black-forest-labs/flux-1-schnell"


parser = argparse.ArgumentParser(
    description="Generate AI images with Cloudflare Workers AI"
)


parser.add_argument(
    "--prompt",
    required=True
)


parser.add_argument(
    "--output",
    default="generated-image.jpg"
)


parser.add_argument(
    "--steps",
    type=int,
    default=4
)


args = parser.parse_args()


if not ACCOUNT_ID:

    raise SystemExit(
        "CF_ACCOUNT_ID is missing from your .env file"
    )


if not API_TOKEN:

    raise SystemExit(
        "CF_API_TOKEN is missing from your .env file"
    )


url = (
    "https://api.cloudflare.com/client/v4/accounts/"
    f"{ACCOUNT_ID}/ai/run/{MODEL}"
)


headers = {

    "Authorization":
    f"Bearer {API_TOKEN}",

    "Content-Type":
    "application/json"

}


payload = {

    "prompt":
    args.prompt,

    "steps":
    args.steps

}


response = requests.post(

    url,

    headers=headers,

    json=payload,

    timeout=120

)


response.raise_for_status()


data = response.json()


image_base64 = (
    data
    .get("result", {})
    .get("image")
)


if not image_base64:

    raise SystemExit(
        f"Cloudflare did not return an image: {data}"
    )


image_bytes = base64.b64decode(
    image_base64
)


with open(
    args.output,
    "wb"
) as image_file:

    image_file.write(
        image_bytes
    )


print(
    f"Image saved to: {args.output}"
)
Step 4: Create a Claude Code Skill
The next step is where the workflow becomes much more powerful.
Instead of manually running the Python command every time you want an image, you can create a Claude Code skill.
The skill teaches Claude when and how to use your image generator.
Create:
.claude/skills/cloudflare-image/SKILL.md
Then add something similar to this:
# Cloudflare AI Image Generator

Use this skill whenever the user requests an image.

## Workflow

1. Understand the user's visual idea.

2. Rewrite the idea into a detailed image-generation prompt.

3. Include:
   - main subject
   - environment
   - composition
   - lighting
   - mood
   - visual style
   - important details

4. Avoid depending on readable AI-generated text.

5. Choose a descriptive filename.

6. Run:

python .claude/skills/cloudflare-image/generate.py \
--prompt "FINAL IMAGE PROMPT" \
--output "generated-images/filename.jpg"

7. Confirm where the generated image was saved.
Now Claude Code has instructions explaining exactly how it should handle an image-generation request.
Step 5: Generate Your First AI Image
Now comes the fun part.
Open Claude Code inside your project folder.
Ask Claude something simple like:
Generate an image of a futuristic home office at night with a programmer working beside a large window.
Claude can turn that simple request into a more detailed prompt.
For example:
cinematic futuristic home office at night,
solo software developer seated at a minimalist desk,
large floor-to-ceiling window overlooking a glowing futuristic city,
soft violet and blue ambient lighting,
modern computer equipment,
realistic photography,
wide composition,
subtle reflections,
high detail,
professional cinematic atmosphere
Claude can then execute:
python .claude/skills/cloudflare-image/generate.py \
--prompt "cinematic futuristic home office at night..." \
--output "generated-images/futuristic-home-office.jpg" \
--steps 4
Cloudflare generates the image.
The Python script saves it locally.
Your new image can then appear inside:
generated-images/futuristic-home-office.jpg
Your Generated Image Appears Here
Replace this visual block with one of your real Cloudflare-generated images after testing the workflow.
The Real Power: Image Iteration
The first generation is usually only the beginning.
You can continue talking to Claude and modify the image direction.
For example:
Make the lighting warmer.
Or:
Generate another version with a wider camera angle.
Or:
Remove the person and focus only on the futuristic office.
Or:
Make the image look like premium commercial photography.
Claude can adjust the prompt and generate another version.
This conversational image-generation workflow can be far faster than manually rewriting prompts inside a traditional AI image platform.
How Many Free Images Can You Generate?
Cloudflare Workers AI measures AI usage using a unit called Neurons.
Cloudflare currently provides:
FLUX.1 schnell currently uses approximately:
- 4.8 Neurons per 512 × 512 image tile
- 9.6 Neurons per diffusion step
Let’s look at an example.
| Item | Approximate Neuron Usage |
|---|---|
| Free Daily Workers AI Allowance | 10,000 Neurons |
| 512 × 512 Image Tile | 4.8 Neurons |
| One Diffusion Step | 9.6 Neurons |
| Example 1024 × 1024 Image With 4 Steps | Approximately 57.6 Neurons |
| Estimated Images With 10,000 Neurons | Approximately 173 Images |
Here is the basic calculation.
A 1024 × 1024 image contains four 512 × 512 tiles.
4 tiles × 4.8 Neurons = 19.2 Neurons
If the image uses four diffusion steps:
4 steps × 9.6 Neurons = 38.4 Neurons
Total:
19.2 + 38.4 = 57.6 Neurons
Then:
10,000 ÷ 57.6 ≈ 173 images
This means a content creator could potentially generate a large number of images every day while remaining inside Cloudflare’s free allocation.
Check the Latest Workers AI Pricing
Cloudflare’s official pricing documentation should always be your source of truth for current Neuron costs and free limits.
View Workers AI Pricing →How to Write Better FLUX.1 Schnell Prompts
Your image quality depends heavily on your prompt.
Claude Code can help improve prompts automatically, but understanding the basic structure of an effective prompt makes the workflow even better.
1. Clearly Describe the Main Subject
Avoid vague prompts.
Instead of:
office desk
Try:
modern walnut standing desk with a thin monitor,
compact mechanical keyboard,
black task lamp,
coffee cup,
notebook,
and wireless headphones
2. Specify the Image Style
Tell the AI what type of visual you want.
Examples include:
- Realistic photography
- Cinematic photography
- Editorial illustration
- 3D render
- Flat vector illustration
- Watercolor painting
- Commercial product photography
- Minimalist design
- Anime illustration
- Digital painting
3. Control the Composition
You can guide the virtual camera.
Try phrases such as:
- Wide-angle shot
- Close-up photography
- Top-down view
- Centered composition
- Portrait framing
- Symmetrical composition
- Subject positioned on the left
- Negative space on the right
4. Describe the Lighting
Lighting dramatically changes how an AI-generated image feels.
Useful phrases include:
- Soft studio lighting
- Golden hour sunlight
- Warm natural lighting
- Dark cinematic lighting
- Neon purple lighting
- Dramatic rim lighting
- Bright commercial studio lighting
- Overcast daylight
5. Describe the Mood
Add emotional direction.
For example:
- Premium
- Professional
- Calm
- Playful
- Futuristic
- Luxury
- Technical
- Minimal
- Dramatic
- Warm
6. Avoid AI-Generated Text When Possible
AI image models are much better at producing scenes and objects than perfectly accurate written text.
For blog featured images or marketing graphics, it is usually better to generate the background image first.
Then add your real headline using:
- Canva
- Photoshop
- Figma
- WordPress
- HTML/CSS
- ImageMagick
- Pillow
How to Use This Workflow for WordPress
This setup can become especially useful if you publish WordPress articles regularly.
Instead of manually searching stock photography sites every time you publish a new article, Claude Code can help create original graphics.
For example:
Create a 16:9 featured image for my article titled
"Best AI Tools for Affiliate Marketing in 2026."

Use a modern futuristic style.

Leave empty space on the left for headline text.
Claude can convert the instruction into a polished image prompt and generate the image automatically.
Create a WordPress Image Preset
You could add the following instructions to your Claude skill:
When creating WordPress featured images:

- Prefer landscape composition.

- Use a clean editorial look.

- Keep important subjects away from the image edges.

- Leave clean negative space for optional headline text.

- Avoid generated text.

- Avoid watermarks.

- Use visually strong colors.

- Make images suitable for blog hero sections and social sharing.
Compress the Image Automatically
You could extend the Python workflow with Pillow to resize and compress each generated image.
Install Pillow:
pip install pillow
Then use Python to optimize each image before uploading it to WordPress.
Advanced AI Image Automation Ideas
Once your basic image generator works, you can turn it into a much more powerful automation system.
Automatic File Naming
Instead of manually choosing filenames, Claude could generate SEO-friendly filenames automatically.
For example:
best-ai-tools-affiliate-marketing-2026.jpg
Automatically Store Prompts
Every generated image could be accompanied by a JSON metadata file.
Example:
{
  "filename": "ai-marketing-tools.jpg",
  "prompt": "modern AI marketing dashboard...",
  "model": "@cf/black-forest-labs/flux-1-schnell",
  "steps": 4
}
This makes it easier to recreate or modify images later.
Create Multiple Image Presets
You could create different Claude skills for:
- WordPress featured images
- Pinterest graphics
- YouTube thumbnail backgrounds
- Facebook advertisement graphics
- Instagram posts
- Amazon affiliate product article graphics
- Blog illustrations
- Landing page backgrounds
- Digital product covers
Generate Multiple Variations
Claude could generate five versions of the same concept automatically.
For example:
Generate five different variations of a futuristic AI marketing office.

Save all images inside:

generated-images/ai-marketing/
Build a Complete Blog Image Pipeline
A more advanced workflow could automatically:
- Read your article.
- Identify the primary keyword.
- Create an image concept.
- Write the AI image prompt.
- Generate the image.
- Resize the image.
- Compress the image.
- Create an SEO-friendly filename.
- Generate ALT text.
- Upload the image to WordPress.
- Set it as the featured image.
At that point, your AI coding assistant becomes part of a complete automated publishing workflow.
Other Ways You Could Use Cloudflare Workers AI
Once you understand the Cloudflare Workers AI API, image generation is only the beginning.
You could build Claude Code skills for:
- AI transcription
- Article summarization
- Keyword classification
- Semantic search
- Automatic image captioning
- Audio transcription
- Translation
- Document processing
- AI chatbot responses
- Content analysis
- Product description generation
The basic concept remains the same.
Frequently Asked Questions
Is Cloudflare Workers AI free?
Cloudflare currently provides 10,000 Workers AI Neurons per day at no charge. Additional usage depends on your Cloudflare plan and Cloudflare’s current pricing.
Do I need a GPU?
No. The AI model runs on Cloudflare’s infrastructure. Your computer simply sends the API request and downloads the generated image.
Do I need to deploy a Cloudflare Worker?
Not for the simple REST API workflow shown in this tutorial. You can call the Workers AI REST endpoint directly.
Can I use the script without Claude Code?
Yes. Claude Code makes the workflow easier because it can write prompts and execute the command for you, but you can also run the Python script manually.
What happens when I reach the free Cloudflare limit?
Once the available free Workers AI allocation is exhausted, additional operations may fail until your usage resets or you use paid Workers AI capacity according to Cloudflare’s current pricing.
Can I generate blog featured images?
Yes. This is one of the best uses for the workflow. You can generate original images for WordPress blog posts and then add your own headline text using Canva or another design tool.
Can I generate YouTube thumbnails?
Yes. A good approach is to generate the visual background with FLUX and then add large readable text separately using Canva, Photoshop, or another graphics tool.
Can I generate multiple images at once?
Yes. You can extend the Python script or ask Claude Code to run the generator repeatedly using different prompts or filenames.
Can I automate image generation for my website?
Yes. You can connect this workflow to WordPress, content scripts, publishing systems, or other APIs. For production use, add proper error handling, logging, rate-limit management, image optimization, and a human review step.
Is FLUX.1 schnell good for AI images?
FLUX.1 schnell is designed for fast image generation and can produce strong general-purpose images, concept art, backgrounds, illustrations, and marketing visuals.
Can I use the generated images commercially?
Before using generated images commercially, review the current licensing terms for the model and platform you are using. Licensing terms can change.
Final Thoughts
Connecting Claude Code with Cloudflare Workers AI creates a surprisingly powerful AI image workflow.
Instead of opening another website, entering a prompt, waiting for an image, downloading it, renaming it, and moving it into your project, the entire process can happen directly inside your normal workflow.
You describe the image.
Claude improves the prompt.
Cloudflare generates the image.
The script saves it automatically.
And once you create a reusable Claude Code skill, the workflow becomes available whenever you need it.
This same architecture can also be expanded far beyond images.
You can connect Claude Code with practically any useful API and turn repetitive digital tasks into reusable AI-powered tools.
Try FLUX.1 Schnell on Cloudflare Workers AI
Create your Cloudflare API token, save the Python script, create your Claude Code skill, and generate your first test image.
Open FLUX.1 Schnell Documentation →Disclosure: Some links on this website may be affiliate or referral links. If you purchase something through one of these links, I may receive a commission at no additional cost to you. Claude, Cloudflare, Workers AI, FLUX and other trademarks belong to their respective owners. This article is an independent educational guide.

Pingback: How to Create Images With Claude Code Without an AI Image Model