How to Install Coolify in 2026: Your Starter Guide to Self-Hosting
Turn a clean Ubuntu VPS into your own deployment platform. This beginner-friendly walkthrough covers Coolify installation, a secure domain, SSL, databases, backups, updates, and the most common setup problems.
Coolify is an open-source platform-as-a-service that runs on infrastructure you control. Install it on a VPS, connect a domain, and you can deploy web apps, Docker workloads, PostgreSQL, Redis, MongoDB and many other services from one dashboard.
Why use Coolify for self-hosting?
Managed hosting is convenient, but costs can climb once a project needs an application host, database, cache, background workers, storage and monitoring. Coolify takes a different approach: you rent a normal VPS and run the platform on your own infrastructure.
That gives you a deployment experience that feels closer to modern managed platforms while keeping control of the server. You can connect Git repositories, deploy Docker-based applications, add environment variables, route domains, request SSL certificates and inspect logs without manually maintaining every container from the command line.
Coolify also supports one-click databases and services. Even when an application is not listed in the service catalog, Docker Compose gives you a flexible way to deploy it.
Step 1: Choose a VPS for Coolify
For learning, a small machine can work. For a more comfortable starter installation, especially if you plan to run multiple apps plus databases, aim higher than the bare minimum.
- Recommended CPU: 4 virtual CPU cores
- Recommended RAM: 8 GB
- Recommended storage: 80–100 GB or more of SSD/NVMe
- Operating system: Ubuntu 24.04 LTS on a fresh server
Popular VPS choices for Coolify
| Provider | Good for | What to look for |
|---|---|---|
| Contabo | High resource allowance for the money | 8 GB RAM tier or better |
| Hetzner | Strong price/performance, especially in Europe | 4 vCPU / 8 GB class |
| Hostinger VPS | Straightforward control panel and beginner-friendly setup | KVM plan with enough RAM |
| DigitalOcean | Simple interface and broad documentation | General-purpose Droplet |
Contabo
A common budget choice when you want more RAM and disk space on a single server.
Check Contabo VPSHetzner
A strong option for developers who want low-cost cloud servers with good performance.
Check Hetzner CloudHostinger VPS
Useful if you prefer an approachable hosting dashboard and an easy server-ordering flow.
Check Hostinger VPSDigitalOcean
Developer-focused infrastructure with a clean cloud interface and a large tutorial ecosystem.
Check DigitalOceanProvision the server
Create a new VPS in a region reasonably close to your audience. Select Ubuntu 24.04 LTS, choose an 8 GB RAM class if your budget allows it, and save the root credentials or SSH key securely.
Step 2: Install Coolify
Once your VPS is online, connect over SSH. Replace the placeholder with your real server IP:
Then run the official Coolify installation script:
The installer prepares Docker and the services Coolify needs, creates its data directories, pulls the required containers and starts the platform.
When the installation finishes, open the IP address and port shown by the installer. A typical first-access URL looks like this:
Complete the initial onboarding
- Create your administrator login.
- Select the local server if Coolify and your workloads will live on the same VPS.
- Create your first project, for example
starter. - Confirm that the server status appears healthy before deploying anything else.
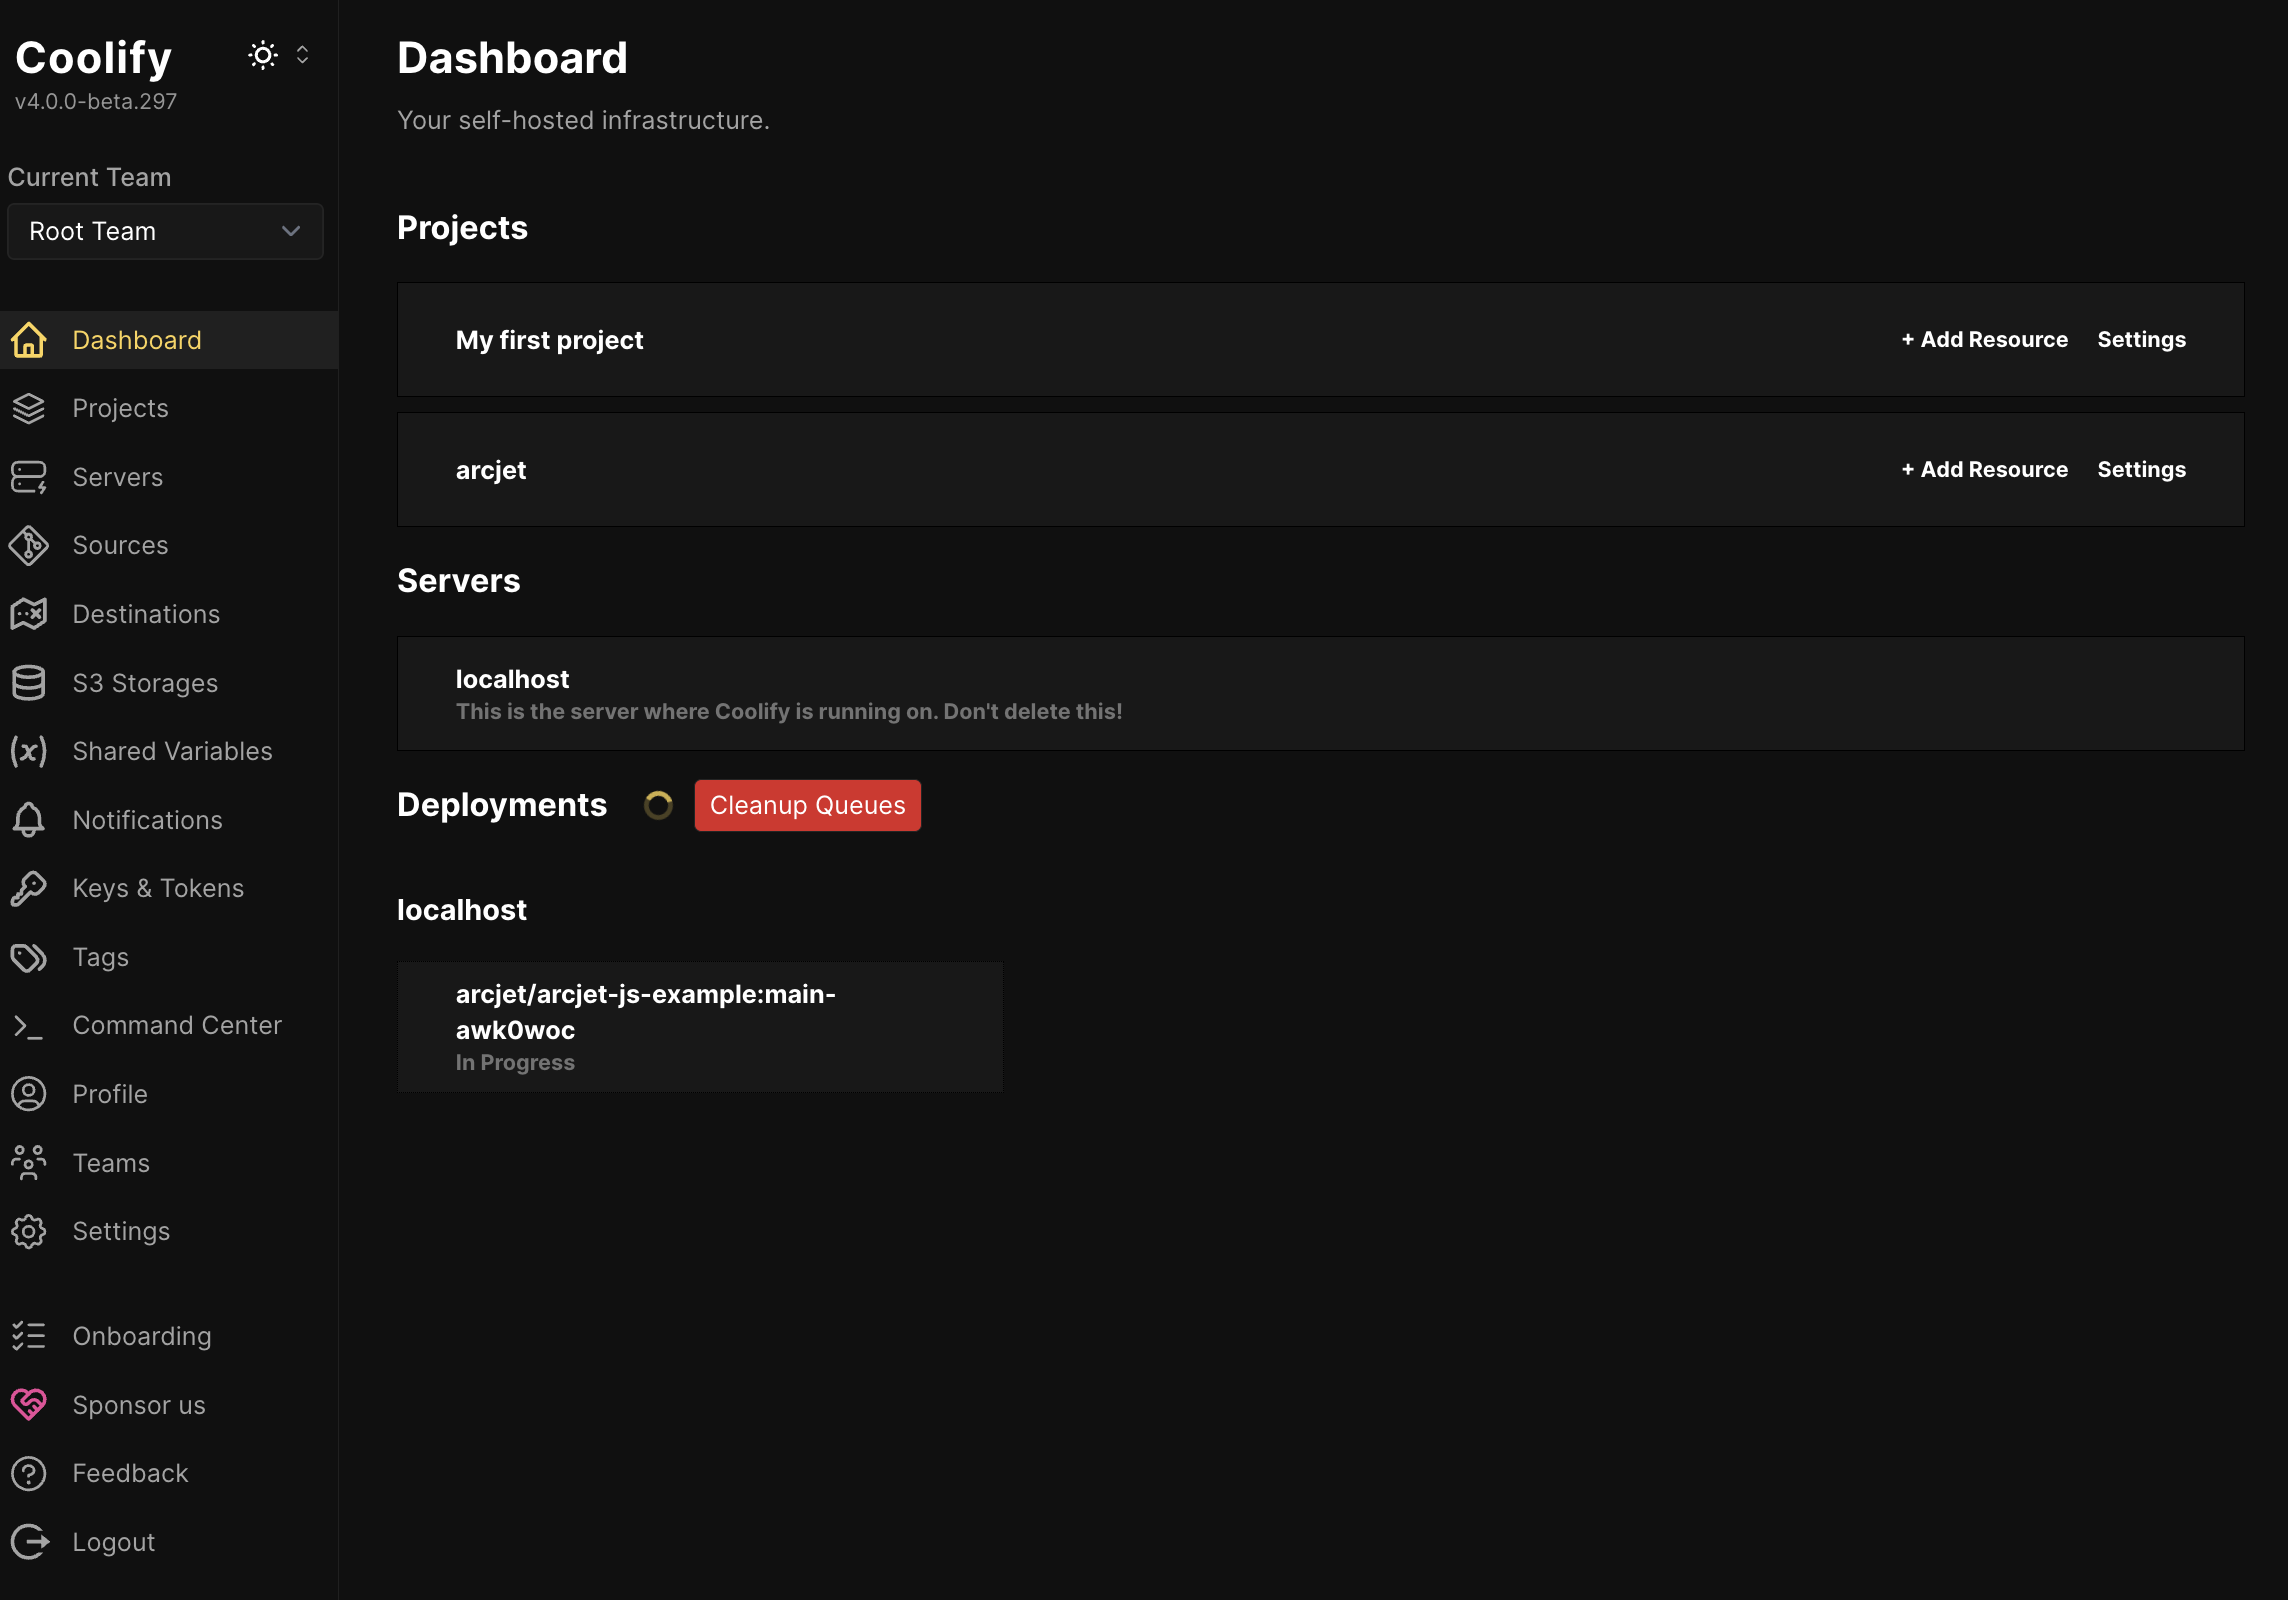
Example of the Coolify dashboard interface. Interface details may change between releases.
Step 3: Connect a domain and enable SSL
Using an IP address is fine during setup, but a custom hostname gives you cleaner access and HTTPS. A subdomain such as coolify.example.com works well.
Create the DNS record
At your DNS provider, add an A record pointing your Coolify subdomain to the VPS:
After DNS begins resolving to the server, open Coolify settings and set the instance domain to your full HTTPS address:
Coolify uses its reverse-proxy stack to route the domain and automate TLS certificates. Once the certificate is issued, the dashboard should load over HTTPS.
Allow the required web traffic
After your custom domain works, avoid leaving unnecessary administrative ports exposed. Also enable two-factor authentication and use SSH keys before hosting production workloads.
Step 4: Deploy PostgreSQL, Redis and MongoDB
One of the most useful Coolify features is the ability to add common databases from the dashboard. Put them in the same project as the application that will use them whenever practical.
PostgreSQL
Open your project and choose New Resource → Databases → PostgreSQL. Keep the generated credentials unless you have a specific reason to change them, then start the resource.
For an application deployed on the same Coolify network, use the internal connection string shown by Coolify. It typically follows this pattern:
Redis
Add Redis through the database picker and start it. Modern Coolify deployments can use password-protected Redis, so your application should use the full connection string supplied by the dashboard.
MongoDB
Repeat the process with MongoDB:
Connect the databases to your application
Open your application’s Environment Variables area and add the URLs Coolify generated for your database resources:
Keeping app-to-database traffic inside Coolify’s Docker network is usually preferable to exposing database ports to the public internet.
Step 5: Back up and update Coolify safely
Self-hosting means you also own the update process. A simple backup habit makes upgrades much less stressful.
Back up the Coolify data directory
Also keep a separate copy of the environment file that contains Coolify’s important secrets:
Move those backups off the server. Object storage, a secure workstation or another protected destination is far better than keeping your only backup on the machine you are updating.
Three update approaches
- Automatic updates: easiest, but gives you less control over timing.
- Dashboard-driven updates: you decide when to apply the available update.
- Manual update: useful for deliberate maintenance or when the dashboard update does not complete.
For production, a controlled update window plus a fresh backup is usually the safest workflow.
Step 6: Common Coolify problems and fixes
1. My application says “No Available Server”
Start with the application logs. A crashed process, missing environment variable, wrong internal port or failing health check can keep the proxy from routing traffic to the container.
- Confirm the application actually starts.
- Verify the exposed port matches the port your app listens on.
- Make sure the app binds to
0.0.0.0, not only127.0.0.1. - Adjust or disable health checks if the app has no valid health endpoint.
2. The Coolify dashboard is unreachable
SSH to the server and check whether the core containers are still running:
If the raw IP dashboard works but the domain does not, investigate DNS and the reverse proxy. If nothing works, inspect container logs and server resource usage.
3. The SSL certificate will not issue
- Confirm the domain resolves to the correct server IP.
- Verify ports 80 and 443 are reachable.
- Check whether a CDN or DNS proxy is interfering with validation.
- Review the proxy logs for ACME or rate-limit errors.
4. One domain works but another does not
Open the affected application’s domain configuration. Make sure the hostname is correct and that the URL scheme is present when Coolify expects it. If you need both root and www, configure both hostnames explicitly.
Coolify FAQ
Is Coolify free?
Coolify can be self-hosted as open-source software. Your primary recurring expense is normally the VPS and any optional external services you add.
How much RAM should I give Coolify?
Small test installations can run with modest resources, but 8 GB of RAM gives a beginner much more breathing room for Coolify plus several applications and databases.
Can I run Coolify without buying a new domain?
Yes. You can begin with the server IP or a temporary hostname, then attach a custom domain later. For a production dashboard, a dedicated HTTPS hostname is cleaner.
Does Coolify support Docker Compose?
Yes. Docker Compose is especially useful when you want to deploy applications made of several containers or when a service is not available in the one-click catalog.
What should I back up?
Back up Coolify’s persistent data, the environment file containing its secrets, and the data volumes for the databases and applications you care about. Keep at least one copy off the VPS.
Is Coolify a replacement for Vercel or Heroku?
It can replace some of the same deployment workflows, but the responsibility is different. With Coolify, you control the underlying infrastructure and therefore also own server security, maintenance, capacity planning and recovery.
What to do after your first Coolify install
Once your dashboard and databases are working, focus on security and recoverability before adding more production workloads. Move SSH to key-based authentication, enable Coolify 2FA, configure off-site backups, monitor disk/RAM usage, and document how you will recover the server if an update goes wrong.